Introduction
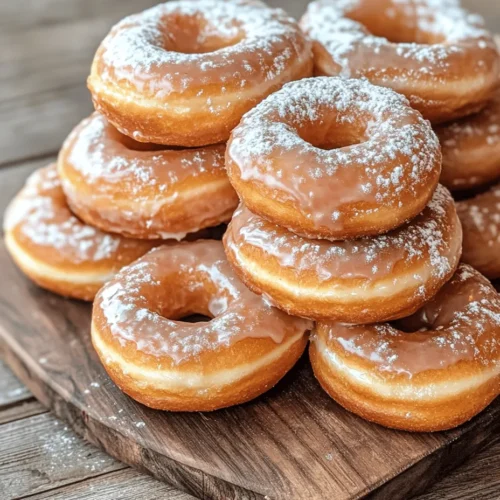
Melt in Your Mouth Glazed Donuts are not just a treat; they are a culinary experience that brings joy and comfort to many. Whether enjoyed during a leisurely weekend breakfast, served at a celebratory brunch, or simply indulged in after a long day, these delectable donuts are sure to please anyone with a sweet tooth. Their signature soft, fluffy texture combined with a sweet, glossy glaze makes them irresistible.
In this article, we will take a deep dive into the world of homemade donuts, guiding you through the step-by-step process of creating these delightful treats from scratch. Along the way, we will explore the rich history of donuts, uncover the reasons behind the rising popularity of homemade confections, and share invaluable tips for perfecting your frying technique and achieving the perfect glaze.
The Allure of Homemade Donuts
Exploring the History of Donuts
The history of donuts is as rich and diverse as the flavors they come in. Although their exact origins are somewhat murky, it is widely believed that donuts were first brought to America by Dutch settlers in the early 19th century. These early versions were known as “olykoeks,” which translates to “oily cakes.” The name “donut” is thought to have originated from the shape of the nut that was sometimes placed in the center of these fried cakes.
As time went on, donuts evolved into the beloved treat we know today, with various shapes, sizes, and flavors emerging. From the classic glazed ring to filled varieties like jelly or cream, donuts have become a staple in American culture. The rise of donut shops in the 20th century further popularized these sweet delights, making them accessible to everyone.
Understanding the Popularity of Homemade Treats
In recent years, there has been a significant increase in the popularity of homemade treats, and donuts are no exception. In a world where convenience often takes precedence, many home bakers are rediscovering the joy of creating something from scratch. There’s a certain satisfaction that comes from whipping up a batch of donuts in your own kitchen, knowing precisely what goes into each one.
Homemade donuts also allow for personalization. You can experiment with flavors, fillings, and glazes, creating a unique treat tailored to your taste preferences. Additionally, making donuts at home can be a fun activity to share with family and friends, turning the process into a memorable experience rather than just a means to an end.
The Joy of Creating Something from Scratch
One of the most rewarding aspects of baking is the ability to create something delicious from simple ingredients. The act of mixing flour, sugar, eggs, and milk to form a dough that will eventually transform into a warm, golden donut is truly magical. This process not only provides a sense of accomplishment but also allows you to bond with loved ones as you work together to create a sweet masterpiece.
When you make donuts at home, you have full control over the quality of ingredients, ensuring that each bite is fresh and flavorful. You can opt for organic flour, high-quality butter, and real vanilla extract, elevating your homemade donuts to a gourmet level. This commitment to quality combined with the joy of creation makes homemade donuts a delightful experience for both the baker and the enjoyer.
Ingredients Breakdown
To achieve the perfect Melt in Your Mouth Glazed Donuts, it’s essential to understand the role of each ingredient in the recipe, as well as to choose the best quality options for optimal flavor. Here’s a breakdown of the essential ingredients you’ll need:
– All-Purpose Flour: This is the base of your donut dough. All-purpose flour has the right balance of protein, allowing for a soft, tender crumb. Be sure to measure it correctly to avoid dense donuts.
– Granulated Sugar: Sugar adds sweetness and helps to create a beautiful golden-brown color during frying. It also contributes to the overall texture of the donuts.
– Baking Powder: This leavening agent is crucial for achieving the light and airy quality of your donuts. It helps the dough rise during frying, giving the donuts their characteristic fluffy texture.
– Salt: A small amount of salt enhances the flavors of the other ingredients and balances the sweetness of the donuts.
– Eggs: Eggs provide structure, moisture, and richness to the donut dough. They also contribute to the overall flavor and texture, making the donuts more satisfying.
– Milk: Milk adds moisture and richness to the dough. Whole milk is recommended for its creaminess, but you can also use buttermilk for a slightly tangy flavor.
– Butter: Unsalted butter adds flavor and moisture to the dough. It also contributes to a tender crumb, making the donuts melt in your mouth.
– Vanilla Extract: Pure vanilla extract enhances the flavor profile of the donuts, adding a warm, aromatic quality that complements the sweetness.
– Oil for Frying: The right oil is essential for frying donuts. Canola oil or vegetable oil is typically recommended due to their high smoke points and neutral flavors. This ensures that your donuts fry evenly without imparting any unwanted flavors.
By selecting high-quality ingredients, you set the foundation for delicious, melt-in-your-mouth donuts.
Step-by-Step Guide to Making Melt in Your Mouth Glazed Donuts
Preparing the Dough
Mixing Dry Ingredients for the Base
The first step in creating your Melt in Your Mouth Glazed Donuts is to prepare the dry ingredients. In a large mixing bowl, combine the all-purpose flour, granulated sugar, baking powder, and salt. Whisk these ingredients together until they are well blended. This not only ensures an even distribution of the leavening agent but also helps to aerate the flour, contributing to a lighter texture in the final product.
Importance of Proper Measurements
When it comes to baking, accuracy is vital. Using the correct measurements can make or break your donut-making experience. It’s best to use a kitchen scale for measuring flour, as it provides the most accurate results. If you don’t have a scale, use the spoon-and-level method: spoon the flour into your measuring cup and level it off with a straight edge without packing it down. This prevents your donuts from becoming too dense.
Combining Wet Ingredients
The Role of Eggs and Dairy in Achieving Texture
In a separate bowl, crack your eggs and whisk them until they are fully beaten. Add the milk and melted butter to the eggs, followed by the vanilla extract. Whisk these wet ingredients together until they are well combined. The eggs provide structure and richness, while the milk and butter add moisture, creating a tender donut.
Tips for Beating Eggs Effectively
When beating eggs, it’s important to incorporate air into the mixture, which helps with the overall texture of the donuts. Use a whisk or hand mixer to beat the eggs vigorously until they are pale and slightly frothy. This not only improves the texture but also ensures that the eggs are fully incorporated into the dough.
Forming the Dough
Techniques for Kneading and Developing Gluten
Once your wet ingredients are mixed, it’s time to combine them with the dry ingredients. Pour the wet mixture into the bowl with the dry ingredients, and use a spatula or wooden spoon to gently fold the two together. Avoid overmixing, as this can lead to tough donuts. Once the dough begins to come together, turn it out onto a lightly floured surface.
To develop gluten, which gives the donuts their structure, knead the dough gently for about 3-5 minutes. Fold the dough over itself and press down, repeating this motion until it becomes smooth and elastic. Be careful not to over-knead, as this can lead to dense donuts.
Importance of Dough Consistency
The consistency of your donut dough is critical for achieving the desired texture. It should be soft and slightly sticky but not overly wet. If the dough feels too sticky, sprinkle in a little more flour, but be cautious not to add too much, as this can result in dry donuts.
Rolling and Cutting the Donuts
Ideal Thickness for Donuts
Once your dough is properly kneaded, it’s time to roll it out. Using a rolling pin, roll the dough to a thickness of about ½ inch. This thickness is ideal for frying, as it allows the donuts to cook evenly while maintaining a fluffy interior.
Tools Needed for Cutting Donuts
To cut your donuts, you’ll need a donut cutter or two round cookie cutters—one larger for the outer shape and one smaller for the center hole. If you don’t have these tools, you can use a glass for the outer shape and a shot glass for the center. Dust the cutters with flour to prevent sticking, and cut out your donuts, placing them on a floured surface as you go.
Heating the Oil
Choosing the Right Oil for Frying
The final preparation step before frying your donuts is heating the oil. Choose an oil with a high smoke point, such as canola or vegetable oil. In a deep fryer or a heavy-bottomed pot, pour in enough oil to submerge the donuts, typically about 2-3 inches deep. Heat the oil over medium heat until it reaches 350°F (175°C). A candy thermometer can help you monitor the temperature, ensuring that the oil is hot enough for frying but not so hot that it burns the donuts.
Once the oil is heated, you are ready to fry your donuts to golden perfection.
Stay tuned for the next part of this article, where we will guide you through the frying process, glazing techniques, and expert tips for achieving the perfect Melt in Your Mouth Glazed Donuts.
Safety Tips for Frying at High Temperatures
Frying donuts can be a delightful culinary adventure, but it also comes with inherent risks. Safety should always be a priority when working with hot oil. Here are several essential safety tips to keep in mind:
1. Choose the Right Frying Oil: Use oils with high smoke points such as vegetable oil, canola oil, or peanut oil. These oils can handle high temperatures without burning.
2. Use a Deep Fryer or Heavy Pot: Ensure you have a deep fryer or a heavy-bottomed pot to minimize the risk of oil splatter. A pot with a lid can be beneficial in case of an emergency.
3. Monitor Oil Temperature: Use a kitchen thermometer to keep the oil at the right temperature (around 350°F to 375°F). Avoid overheating, as this can lead to a fire hazard.
4. Do Not Overcrowd the Pot: Fry in small batches to maintain the temperature and avoid excessive oil splatter. Overcrowding can lower the oil temperature, resulting in greasy donuts.
5. Keep a Fire Extinguisher Nearby: Always have a fire extinguisher accessible in the kitchen in case of an oil fire. Never use water to extinguish an oil fire, as it can cause the flames to spread.
6. Use Long Tongs or a Slotted Spoon: When placing donuts in the hot oil or removing them, use long tongs or a slotted spoon to keep your hands away from the hot oil.
Understanding Temperature Control for Perfect Frying
Temperature control is crucial for frying donuts to perfection. Here’s what you need to know:
– Heat the Oil Gradually: Start heating the oil on medium heat and adjust as necessary. Rapid heating can lead to uneven frying or burnt oil.
– Maintain Consistent Temperature: Use a thermometer to monitor the temperature closely. If the oil becomes too hot, it can burn the outside of the donut before the inside is cooked.
– Fry in Batches: As mentioned earlier, frying in small batches helps retain the oil temperature and results in even cooking. Each batch should be spaced apart to avoid clumping.
Frying the Donuts
Techniques for Achieving That Golden Brown Color
To achieve that desirable golden brown color, follow these techniques:
1. Check the Oil Temperature: Before frying, ensure the oil is at the desired temperature. If you drop a small piece of dough into the oil and it sizzles immediately, you’re good to go.
2. Donut Size Matters: Make sure your donut shapes are consistent in size. Smaller donuts will cook faster, while larger ones may need extra time.
3. Fry Until Golden: Fry each donut for about 1-2 minutes per side or until they turn a beautiful golden brown. Use a slotted spoon to flip them carefully, ensuring even cooking.
Best Practices for Frying in Batches
1. Avoid Overcrowding: Place only a few donuts in the oil at one time. This helps maintain the oil temperature and prevents the donuts from sticking together.
2. Use a Timer: Keep track of the frying time with a timer to ensure all donuts are cooked evenly and to prevent burning.
3. Draining Excess Oil: After frying, allow the donuts to drain on a cooling rack lined with paper towels to absorb excess oil before glazing.
Making the Glaze
Achieving the Perfect Consistency for Glaze
The key to a luscious glaze lies in its consistency. Here’s how to get it just right:
1. Start with Powdered Sugar: In a mixing bowl, start with powdered sugar as your base. This sugar dissolves easily and creates a smooth glaze.
2. Add Liquid Slowly: Gradually add milk or water to the powdered sugar, mixing continuously. Aim for a thick but pourable consistency. If it’s too runny, add more powdered sugar; if too thick, add a tiny bit more liquid.
3. Test the Consistency: Dip a spoon into the glaze; it should coat the back of the spoon but still drip off smoothly. Adjust as necessary for your desired thickness.
Flavor Variations to Consider
Don’t hesitate to get creative with your glaze. Here are some flavor variations to try:
– Vanilla Glaze: Add a splash of vanilla extract for a classic flavor enhancement.
– Chocolate Glaze: Mix melted chocolate with the glaze for a rich chocolatey finish.
– Citrus Glaze: Incorporate lemon or orange juice for a refreshing citrus twist.
– Spiced Glaze: Add a pinch of cinnamon or nutmeg for a warm, spiced flavor.
Glazing the Donuts
Techniques for Dipping and Coating Donuts Evenly
1. Dip and Twirl: Hold each donut by the edges and dip it into the glaze, twirling it to coat evenly. Allow excess to drip back into the bowl.
2. Use a Fork: For added control, use a fork to dip the donuts into the glaze, ensuring even coverage without getting your fingers messy.
3. Layered Glaze: For a thicker layer of glaze, let the first coat set for a few minutes, then dip again for a double glaze effect.
Allowing Glaze to Set for Maximum Enjoyment
After glazing, allow the donuts to sit on a wire rack for a few minutes. This resting period lets the glaze set and harden slightly, ensuring each bite is a perfect balance of fluffy donut and sweet glaze.
Serving Suggestions
Melt in Your Mouth Glazed Donuts are best enjoyed fresh. Here are some ideas to enhance your tasting experience:
1. Pairing Options: Serve your donuts with a steaming cup of coffee, aromatic tea, or a glass of cold milk. The sweet glaze pairs beautifully with the bitterness of coffee or the warmth of tea.
2. Creative Serving Ideas: For special occasions, consider serving the donuts on a tiered cake stand for a whimsical display. You can also drizzle chocolate or caramel sauce over them for added flair.
3. Donut Bar: Create a donut bar at parties with various toppings and glazes, allowing guests to customize their own donuts.
Variations of Melt in Your Mouth Glazed Donuts
Explore different flavors and ingredients to keep your donut-making exciting. Here are some variations to consider:
– Chocolate Glazed Donuts: Use a chocolate glaze made with melted chocolate and cream for a rich indulgence.
– Seasonal Variations: Embrace the seasons with pumpkin spice donuts in the fall or berry-infused donuts in the summer.
– Alternative Glazes and Toppings: Experiment with maple glaze, coconut flakes, or chopped nuts for unique textures and flavors.
The Science of Donut Making
Understanding the science behind donut making can elevate your baking skills:
– Frying Chemistry: When donuts are fried, the outer layer cooks quickly, creating a crispy shell while trapping moisture inside. This results in the soft, fluffy texture we love.
– Ingredient Interactions: The combination of flour, sugar, and yeast creates the perfect dough structure. Yeast ferments, releasing carbon dioxide, which causes the dough to rise.
– Temperature Role: The right frying temperature ensures that donuts cook evenly and achieve that perfect golden color while maintaining a soft interior.
Conclusion
Melt in Your Mouth Glazed Donuts are not just a delicious treat; they encapsulate the warmth of home cooking and the joy of sharing sweet moments with loved ones. By following this comprehensive guide, you’ll not only master the art of donut-making but also appreciate the nuances that make these treats so special. Whether you choose to stick with the classic glaze or experiment with variations, these donuts are sure to bring smiles to faces and sweetness to your day. Embrace the process and savor each bite of your homemade creation.