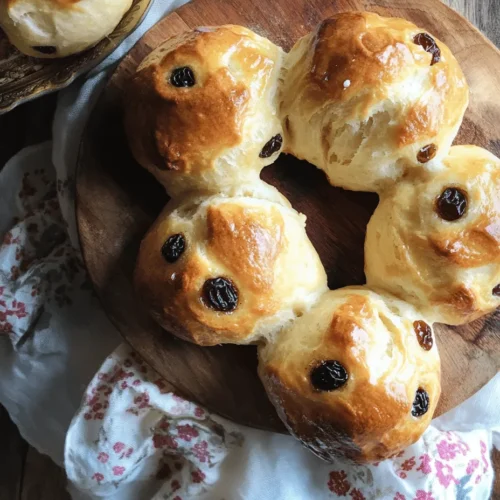
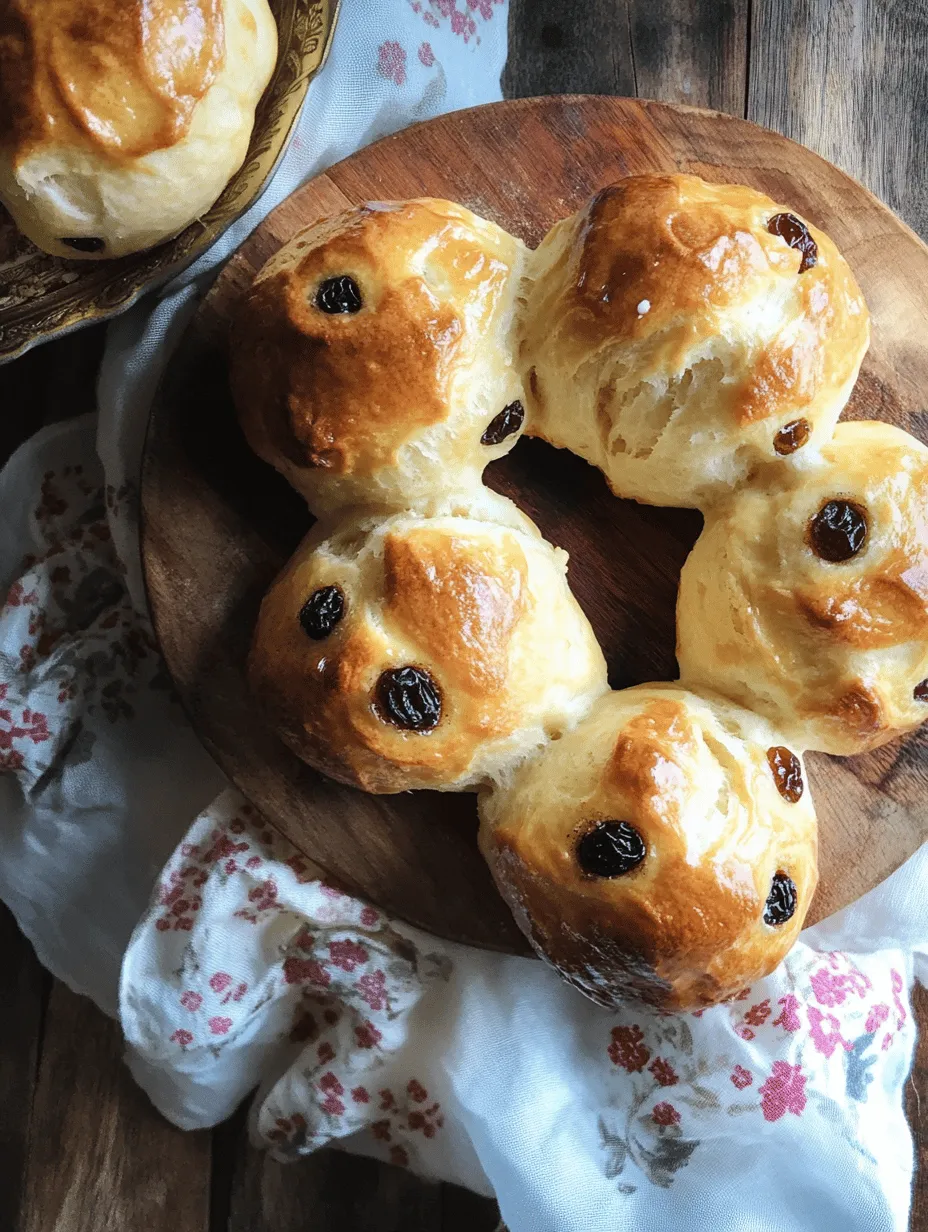
In the world of baked goods, few treats can evoke the same sense of comfort and nostalgia as tea buns. These delightful pastries, perfect for tea time or as a sweet snack, bring together simple ingredients to create a soft, fluffy texture that pairs wonderfully with your favorite beverages. Originating from various cultures, tea buns have become a beloved staple in many households around the globe. The versatility and simplicity of this recipe make it accessible to bakers of all skill levels, from the novice to the seasoned expert. In this article, you will find a comprehensive guide to making these delightful tea buns, providing a step-by-step recipe, tips for customization, and insights into their history and versatility. Whether you’re looking to impress family and friends or simply indulge in a comforting treat, this recipe is sure to become a favorite in your baking repertoire.
Understanding the Ingredients: What Makes Tea Buns Special
To truly appreciate the delightful tea bun, it’s essential to understand the core ingredients that come together to create this mouthwatering treat. Each component plays a pivotal role in achieving the perfect texture and flavor that tea buns are celebrated for. Let’s explore these fundamental ingredients in detail.
All-Purpose Flour: The Foundation of the Buns
All-purpose flour is the backbone of most baking recipes, including our tea buns. It provides the necessary structure and texture that make these pastries light and fluffy. The gluten content in all-purpose flour allows the dough to rise properly and hold its shape during baking. When measuring flour, it’s crucial to avoid compacting it in the measuring cup, as this can lead to using too much flour and subsequently resulting in dense buns.
Granulated Sugar: Sweetens the Buns
Granulated sugar is not only responsible for sweetening the buns but also enhances their overall flavor profile. Sugar helps to caramelize the exterior of the buns during baking, creating a golden-brown crust that is both visually appealing and delicious. Additionally, sugar plays a role in retaining moisture, ensuring that the finished product remains soft and tender.
Baking Powder: The Leavening Agent
Baking powder is an essential ingredient that ensures our tea buns rise beautifully. It contains both an acid and a base, which react when combined with moisture and heat, producing carbon dioxide gas. This gas forms bubbles in the dough, causing it to rise and develop a light, airy texture. It’s important to use fresh baking powder for optimal results, as expired leavening agents can lead to flat, dense buns.
Unsalted Butter: Adding Richness
Unsalted butter contributes richness and flavor to the tea buns while also helping to create a tender crumb. The fat in butter coats the flour particles, inhibiting gluten formation, which results in a softer texture. Using unsalted butter allows you to control the amount of salt in the recipe, ensuring a balanced flavor. For best results, make sure the butter is at room temperature before using it in the recipe; this allows for easier creaming with sugar.
Milk and Eggs: Essential for Moisture
Milk and eggs are crucial components that provide moisture and binding properties to the dough. Milk adds richness and helps to dissolve dry ingredients, while eggs contribute structure and stability. The proteins in eggs also help to create a beautiful golden color in the finished buns. Be sure to use large eggs and whole milk for the best flavor and texture.
Vanilla Extract: A Touch of Flavor
Vanilla extract adds a subtle yet essential flavor that elevates the overall taste of the tea buns. It complements the sweetness of the sugar and the richness of the butter, creating a harmonious flavor profile. For a more intense vanilla flavor, consider using pure vanilla extract instead of imitation.
Optional Ingredients: Customization for Unique Flavors
While the basic tea bun recipe is simple and delicious on its own, there’s plenty of room for customization. You can enhance the flavor and texture of your tea buns by adding optional ingredients such as:
– Ground Cinnamon: A warm spice that pairs perfectly with the sweetness of the buns. Adding just a teaspoon or two can bring a delightful warmth to your pastries.
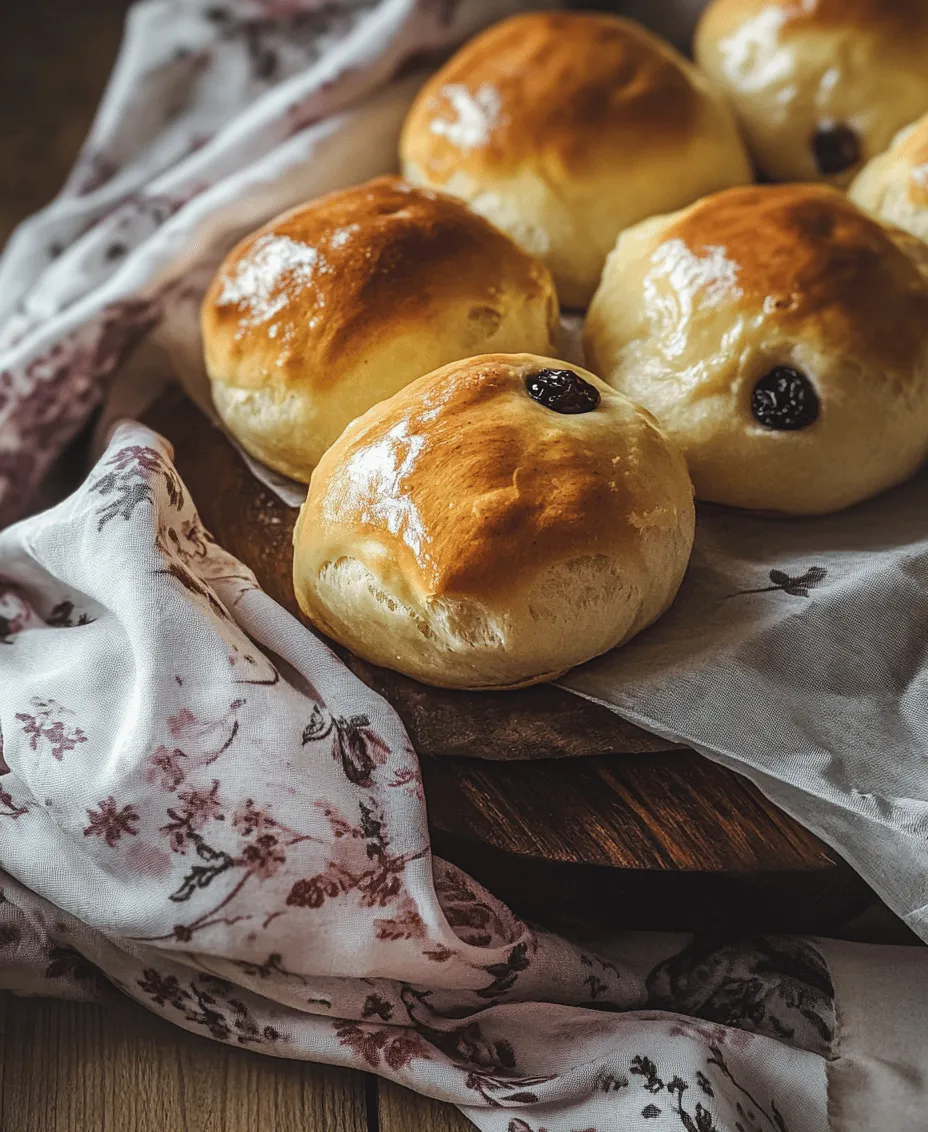
– Dried Fruits (Raisins or Currants): Incorporating dried fruits adds bursts of sweetness and texture to the buns. Soak the fruits in warm water or tea for a few minutes before adding them to the dough to ensure they remain plump and moist during baking.
Preparing the Perfect Tea Buns: Step-by-Step Instructions
Now that we’ve covered the essential ingredients that make tea buns special, let’s dive into the preparation process. These straightforward steps will guide you through the baking journey, ensuring you create a batch of delightful tea buns that are sure to impress.
Step 1: Preheating the Oven – Setting the Stage for Baking
Before you begin mixing your ingredients, it’s crucial to preheat your oven. This ensures that the buns bake evenly and achieve the desired texture. Set your oven to 375°F (190°C) and allow it to fully preheat before placing your buns inside. An adequately heated oven is vital; if your oven is too cool, the buns may not rise properly, resulting in a dense texture.
While the oven is preheating, prepare your baking sheet. You can line it with parchment paper or a silicone baking mat to prevent sticking and make cleanup easier. This step is essential for achieving perfectly baked buns without any mess on your baking sheet.
Step 2: Mixing the Dry Ingredients – Achieving the Right Consistency
In a large mixing bowl, combine your dry ingredients: all-purpose flour, granulated sugar, baking powder, and any optional spices like ground cinnamon. Whisk these ingredients together until evenly mixed. Properly incorporating the dry ingredients at this stage ensures that the leavening agent is evenly distributed throughout the dough, which is key to achieving a uniform rise.
Step 3: Creaming the Butter – The Key to Fluffy Buns
In a separate mixing bowl, place your room temperature unsalted butter. Using an electric mixer, cream the butter on medium speed until it becomes light and fluffy, usually taking about 2-3 minutes. The goal is to incorporate air into the butter, which will help create a tender texture in the finished buns.
Once the butter is adequately creamed, add the granulated sugar from the dry ingredients mixture. Continue to beat the mixture until it is well combined and fluffy. This step is crucial; if the butter is too cold, it will not cream properly, which can lead to denser buns.
Step 4: Combining Wet Ingredients – Creating the Base
Now it’s time to incorporate the wet ingredients into the creamed butter mixture. Add the eggs one at a time, mixing well after each addition. Then, pour in the milk and vanilla extract. Mix on low speed until everything is just combined. Be careful not to overmix; overmixing can result in tough buns due to gluten formation. The mixture should be smooth and slightly thick.
With the wet and dry ingredients prepared, you’re now ready to combine them. Gradually add the dry ingredients mixture to the wet mixture, stirring gently with a spatula or wooden spoon. Mix until just combined, ensuring not to overwork the dough. If you’re adding dried fruits, fold them in at this stage.
This is just the beginning of your delightful tea bun journey. Stay tuned as we explore the remaining steps that will lead you to perfectly baked tea buns.
Shaping the Buns: Techniques for Uniformity
Achieving uniformity in your tea buns is essential for consistent baking results. Proper shaping not only affects the appearance of the buns but also ensures that they bake evenly. To start, it’s important to knead your dough correctly. Kneading is crucial as it develops gluten, which gives the buns their structure. However, be cautious not to overwork the dough; this can lead to tough buns instead of soft, fluffy ones.
Best Practices for Kneading Dough Without Overworking It
1. Kneading Duration: Aim for about 8 to 10 minutes of kneading by hand or 5 to 7 minutes if using a stand mixer. The dough should be smooth and elastic but still slightly tacky.
2. Use the Right Technique: When kneading by hand, stretch the dough out and fold it over itself, then turn it a quarter turn and repeat. This method helps incorporate air without overworking the dough.
3. Resting Period: If the dough feels too tight or difficult to work with, let it rest for 5 to 10 minutes. This relaxation allows the gluten to settle, making it easier to shape.
Tips for Shaping Even Buns for Consistent Baking Results
1. Divide the Dough: Once the dough has risen and doubled in size, gently punch it down and turn it out onto a lightly floured surface. Divide it into equal portions using a bench scraper or a sharp knife. Aim for each piece to weigh around 50 grams for uniformity.
2. Shaping Technique: For each piece of dough, gently flatten it into a disc and then fold the edges toward the center. Flip it over so that the seam is on the bottom and roll it gently into a ball. This technique helps create surface tension, which will assist in rising during baking.
3. Final Shaping: Place the shaped buns on a lined baking sheet, ensuring there is enough space between each to allow for expansion during baking. Ideally, leave about an inch of space between each bun.
Preparing for Baking: Final Touches Before the Oven
As you prepare to bake your tea buns, taking a few final steps will enhance their flavor and appearance.
The Significance of Spacing the Buns on the Baking Sheet
Proper spacing is crucial in achieving that perfect rise and golden crust. If the buns are too close together, they may bake into each other, resulting in uneven shapes. Proper spacing also allows heat to circulate evenly around each bun, contributing to that desired fluffy interior and crisp exterior.
How Brushing with Melted Butter Enhances Flavor and Appearance
Before placing the buns in the oven, brush the tops with melted butter. This not only adds flavor but also contributes to a beautiful golden-brown finish. For added richness and a slight sheen, you might consider sprinkling a little coarse sugar on top after brushing with butter. This creates a delightful crunch and enhances the visual appeal of your tea buns.
Baking Process: Timing and Temperature for Perfection
Understanding the baking process is key to achieving perfectly baked tea buns.
Understanding the Baking Time and How to Check for Doneness
Preheat your oven to 375°F (190°C) and bake the buns for approximately 15-20 minutes. It’s essential to keep an eye on them during the last few minutes of baking. Use a digital thermometer to check the internal temperature of the buns; they should reach about 190°F (88°C) when done.
Signs That Your Tea Buns Are Ready to Come Out of the Oven
Look for a few telltale signs to determine if your tea buns are ready:
1. Visual Cues: The tops should be a beautiful golden brown, and the buns should have risen significantly.
2. Sound Check: Tap the bottom of a bun lightly; it should sound hollow if they are baked through.
3. Texture Test: Gently press the top of a bun; it should spring back rather than feel dense or sink in.
Cooling and Serving: Enjoying Your Creation
Once your delightful tea buns are baked to perfection, it’s time to cool and serve them properly.
Tips for Cooling the Buns Properly to Maintain Texture
After removing the buns from the oven, allow them to cool on the baking sheet for about 5 minutes. This resting period helps to firm up the structure. Then, transfer them to a wire rack to cool completely. This step is crucial as it prevents the bottoms from becoming soggy, ensuring a delightful texture that is both soft and airy.
Suggested Serving Ideas: Pairing with Jams, Clotted Cream, or Enjoying Plain
Tea buns are incredibly versatile and can be enjoyed in various ways. Here are some delightful serving suggestions:
– With Jams: Pair your tea buns with your favorite jams or preserves, such as strawberry, raspberry, or even lemon curd for a refreshing twist.
– Clotted Cream: For a decadent treat, serve with clotted cream, which adds a rich and creamy texture that complements the softness of the buns beautifully.
– Plain Enjoyment: Of course, these buns are delightful on their own. Enjoy them warm with a cup of tea or coffee, appreciating their buttery flavor and tender crumb.
The Versatility of Tea Buns: Customization Options and Flavor Variations
One of the best aspects of tea buns is their adaptability. You can easily customize them to suit your taste preferences.
Exploring Flavor Enhancements
1. Different Spices: Consider adding a pinch of nutmeg or cardamom to your dough for an aromatic twist. These spices can elevate the flavor profile, giving your tea buns a unique character.
2. Fruit Additions: For a fruity variation, fold in dried fruits like cranberries, apricots, or even chocolate chips during the mixing process. This not only adds sweetness but also creates a delightful texture contrast.
Adapting for Dietary Preferences
1. Gluten-Free Alternatives: If you or someone you know has a gluten intolerance, you can substitute all-purpose flour with a gluten-free flour blend. Be sure to follow the instructions on the blend for the best results, as gluten-free dough can behave differently.
2. Vegan Adaptations: To make your tea buns vegan, replace the dairy milk with almond or oat milk, and use a vegan butter substitute. Applesauce or a flaxseed meal mixed with water can replace eggs while still keeping the buns moist and delicious.
The Cultural Significance of Tea Buns: A Brief History
Tea buns have a rich history that reflects their cultural significance across various regions.
Tracing the Origins of Tea Buns
Historically, tea buns became popular during the Victorian era in England, where tea time emerged as a cherished social tradition. These soft, lightly sweetened buns were often served alongside tea, creating a delightful pairing that brought people together. The simplicity of the ingredients and the ease of preparation made them a beloved staple in many households.
Cultural Variations: How Different Regions Interpret This Beloved Snack
Across the globe, variations of tea buns exist, each reflecting local tastes and traditions. In the United Kingdom, for instance, tea buns may be enriched with spices and dried fruit, while in other cultures, they might be more savory, incorporating herbs or cheese. Understanding these variations enhances our appreciation of this simple yet versatile treat.
Conclusion: Embracing the Joy of Baking Tea Buns
Creating delightful tea buns is not just about following a recipe; it’s about embracing a tradition that brings warmth and joy to any occasion. With simple ingredients and straightforward steps, you can craft these delicious treats that are sure to be a hit at your next gathering. By understanding the ingredients, preparation techniques, and cultural significance, you can appreciate the art of baking while enjoying the fruits of your labor.
Whether served at a cozy tea party or enjoyed solo with a cup of coffee, these tea buns are a delightful addition to any culinary repertoire. Experiment with different flavors or serve them in various ways, and you’ll discover the endless possibilities that make tea buns a beloved treat for all. Happy baking!