Introduction
Bibingka is a cherished traditional delicacy from the Philippines, renowned for its soft, fluffy texture and delightful flavor. This rice cake, made primarily from rice flour and coconut milk, holds a special place in Filipino culture, often enjoyed during festive occasions such as Christmas and local festivals. The sweet, slightly savory treat is typically sold by street vendors or made at home, where families gather to share in the joy of cooking and eating together.
This Heavenly Bibingka Delight recipe serves as an easy-to-follow guide for anyone looking to recreate this beloved Filipino dessert in their own kitchen. Whether you’re celebrating the holiday season or simply wanting to enjoy a taste of the Philippines, this bibingka recipe will bring warmth and nostalgia to your dining table.
Understanding Bibingka
Bibingka is more than just a dessert; it embodies the spirit of Filipino gatherings, evoking memories of family traditions and communal festivities. Traditionally, bibingka is made in clay pots lined with banana leaves, which impart a subtle aroma and flavor to the cake. The dish is often associated with the Christmas season, particularly during the nine-day Simbang Gabi (Dawn Mass) leading up to Christmas Eve, where it is enjoyed warm with butter, grated coconut, and sometimes topped with salted eggs and cheese.
The popularity of bibingka transcends regional boundaries, with distinct variations found across the Philippines. In Luzon, for instance, the bibingka is made with a thicker batter and is often served with a sprinkling of cheese on top. Meanwhile, in the Visayas and Mindanao regions, you may find bibingka infused with more tropical flavors, such as ube (purple yam) or even flavored with pandan. Each region adds its unique twist to this classic dish, showcasing the diversity of Filipino cuisine.
Ingredients Breakdown
Creating the perfect bibingka requires a careful selection of ingredients, each playing a crucial role in achieving the cake’s signature texture and flavor. Here’s a closer look at the key ingredients that make up this Heavenly Bibingka Delight:
Rice Flour
Rice flour is the primary ingredient in bibingka, providing the cake with its characteristic chewy texture. Unlike all-purpose flour, rice flour is gluten-free, allowing the bibingka to maintain its light and airy structure. This base ingredient contributes to the overall authenticity of the dish, making it a staple in many Filipino kitchens.
Coconut Milk
Coconut milk is another essential component, adding richness and a distinct tropical flavor that perfectly complements the rice flour. It enhances the dessert’s creaminess and moistness, creating a delectable balance that is both satisfying and refreshing. The use of fresh or canned coconut milk ensures a robust coconut flavor that elevates the bibingka experience.
Sugar
Sugar is vital for balancing the flavors in bibingka. It not only sweetens the cake but also contributes to its golden-brown crust when baked. The amount of sugar can be adjusted based on personal preference, allowing you to customize the sweetness to your liking.
Baking Powder and Salt
Baking powder serves as the leavening agent in the bibingka, ensuring that the cake rises to a fluffy texture during baking. A pinch of salt is also essential; it enhances the overall flavor profile and helps to balance the sweetness of the sugar.
Eggs
Eggs act as a binding agent, bringing the ingredients together and adding richness to the bibingka. They contribute to the cake’s structure, ensuring it holds its shape and maintains a soft consistency after baking.
Grated Fresh Coconut
While optional, grated fresh coconut can be added for an extra boost of texture and flavor. It adds a delightful chewiness and enhances the coconut flavor profile, making each bite even more enjoyable.
Banana Leaves
The traditional use of banana leaves is not only for aesthetic purposes but also for the unique flavor infusion they provide. When lined in the baking dish, the banana leaves impart a subtle, earthy aroma to the bibingka, enhancing the overall culinary experience. They also prevent the cake from sticking to the pan, making for an easier release once baked.
Butter and Cheese
Butter adds richness and depth to the bibingka, giving it a satisfying mouthfeel. Cheese, typically grated, is often sprinkled on top before serving, providing a savory contrast that beautifully complements the sweetness of the cake. Popular choices include cheddar or a local Filipino cheese, which melts beautifully during baking.
Salted Duck Eggs
Salted duck eggs are a traditional addition to bibingka, offering a unique savory element that contrasts the sweet and creamy flavors of the cake. These eggs are often sliced and placed on top of the bibingka before it is baked, creating a visually appealing presentation and adding a burst of flavor.
Preparation Steps
Before diving into the actual baking of your Heavenly Bibingka Delight, it’s crucial to prepare your ingredients and tools correctly. Following these initial steps will set you up for success:
Preheating the Oven
The first step in preparing bibingka is preheating your oven. This is essential for achieving the right baking temperature, ensuring that the cake cooks evenly and rises properly. Preheat your oven to 375°F (190°C), allowing it ample time to reach the desired temperature before placing your bibingka inside.
Preparing the Baking Dish
Next, it’s time to prepare your baking dish for the bibingka. Traditionally, a round, shallow cake pan or a clay pot is used, but any oven-safe dish will work.
1. Soften the Banana Leaves: To line your baking dish with banana leaves, you’ll need to soften them first. Carefully pass the leaves over an open flame or dip them in hot water for a few seconds. This process makes the leaves pliable, preventing them from tearing when you place them in the dish.
2. Line the Dish: Once softened, lay the banana leaves inside your baking dish, allowing the edges to hang over the sides. This will create a natural, aromatic lining for your bibingka, enhancing its flavor and making it easy to remove after baking.
Now that your ingredients are ready and your baking dish is prepped, you are well on your way to creating the perfect Heavenly Bibingka Delight. Stay tuned as we delve into the detailed step-by-step instructions for crafting this delicious Filipino treat.
Tips for Ensuring Proper Lining for Easy Removal
One of the key steps to make your Bibingka Delight a success is ensuring that your baking dish is properly lined. This prevents the cake from sticking and allows for easy removal. Here are some tips to achieve that:
1. Use Banana Leaves: Traditionally, bibingka is baked in banana leaves which not only prevent sticking but also impart a subtle flavor. If you can find banana leaves, lay them flat inside your baking dish, allowing some overhang for easy removal. If banana leaves are unavailable, parchment paper works well too.
2. Grease the Lining: Even if you’re using banana leaves or parchment paper, it’s good practice to lightly grease the surface with oil or butter. This extra layer of protection ensures that your bibingka comes out smoothly.
3. Cut to Fit: If you’re using parchment paper, cut it to fit the bottom of the pan and allow some paper to overlap the edges for easier lifting. This technique is particularly useful for round cake pans.
Mixing the Batter
Creating the perfect bibingka batter is a crucial step that requires attention to detail. Here’s how to mix your ingredients for a heavenly result:
Combining Dry and Wet Ingredients
1. Start with the Dry Ingredients: In a large mixing bowl, whisk together 1 cup of rice flour, 1/2 cup of all-purpose flour, and 1 tablespoon of baking powder. This combination provides the right texture, while the baking powder helps the bibingka rise.
2. Incorporate Sugar: Add 1/2 cup of granulated sugar to the dry ingredients. Mixing sugar with the flour helps to prevent clumping later on.
3. Combine Wet Ingredients Separately: In another bowl, whisk together 1 cup of coconut milk, 1/2 cup of milk, and 1/4 cup of melted butter. The melted butter should be cooled slightly before mixing in to avoid cooking the eggs.
4. Add Eggs: Beat in 2 large eggs to the wet mixture. Eggs add moisture and help bind the ingredients together.
5. Mixing Together: Pour the wet ingredients into the dry ingredients. Use a spatula or wooden spoon to combine them gently.
Importance of Achieving a Smooth Batter Without Lumps
It’s essential to mix until just combined; overmixing can lead to a dense bibingka. If you notice any lumps, use a whisk to break them down gently. The goal is to achieve a smooth batter that will rise nicely during baking.
Incorporating Additional Ingredients
To elevate the flavor and texture of your bibingka, consider incorporating grated coconut and melted butter.
1. Grated Coconut: Fold in 1/2 cup of fresh grated coconut into the batter after it has been mixed. This ingredient adds moisture and a delicious coconut flavor that is characteristic of traditional bibingka.
2. Melted Butter: Ensure the melted butter is evenly distributed throughout the batter to enhance richness. It also contributes to the bibingka’s tender crumb.
Layering and Baking the Bibingka
Now that you have your batter ready, it’s time to layer and bake your bibingka.
Pouring the Batter
1. Initial Layer: Pour about one-third of the batter into your lined baking dish. This forms the base layer.
2. Adding Salted Eggs and Cheese: Arrange slices of salted eggs and sprinkle cheese (preferably a mix of cheddar and queso de bola) on top of the batter. The layering should ensure that each bite has a balanced distribution of flavors.
3. Top Layer: Pour the remaining batter over the salted eggs and cheese. This ensures that they are enveloped in the cake and contributes to the overall flavor profile.
Baking Process
1. Baking Time: Preheat your oven to 375°F (190°C) and bake for 30-35 minutes. It’s crucial to monitor the time closely.
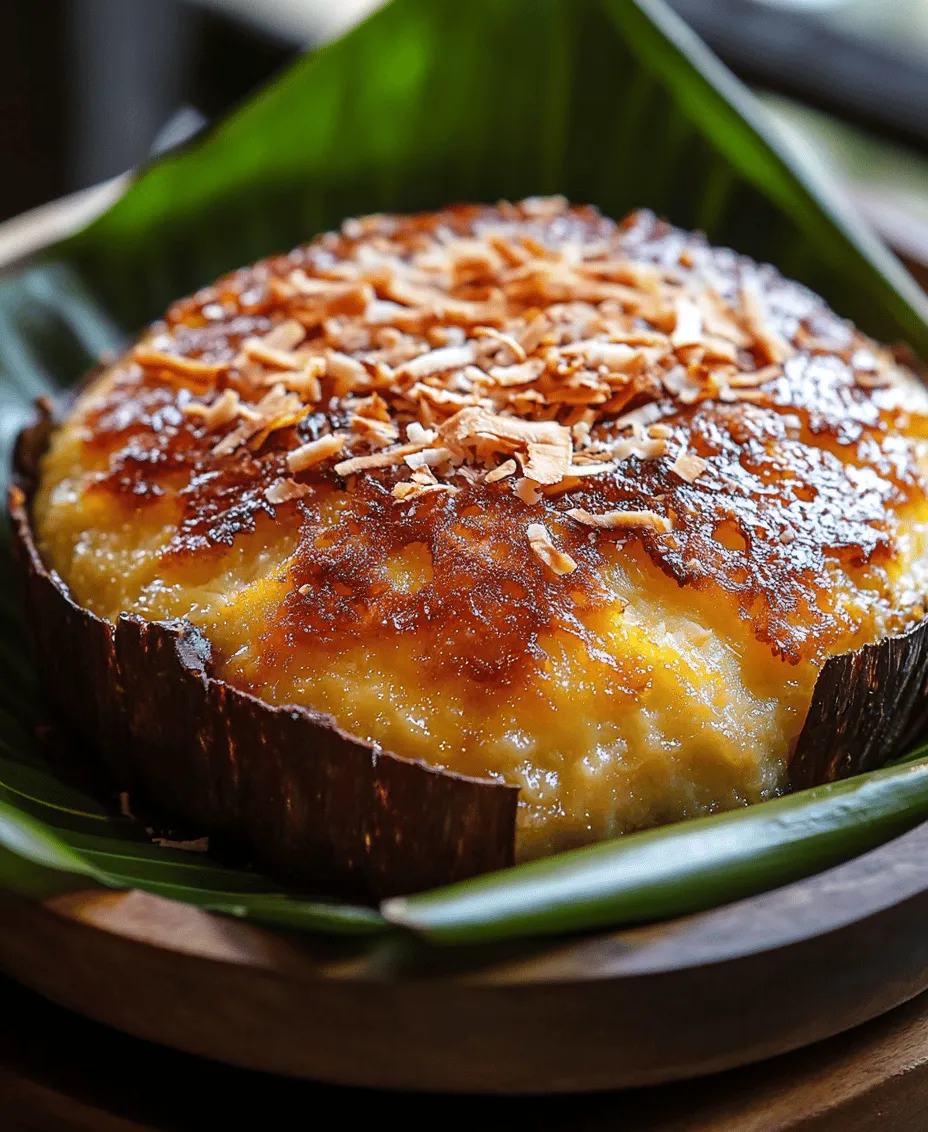
2. Visual Cues: The bibingka should turn a beautiful golden brown color during baking. To check for doneness, insert a toothpick into the center; it should come out clean or with a few moist crumbs.
Finishing Touches
Once your bibingka is baked to perfection, it’s time for the finishing touches that make it irresistible.
Techniques for Adding Toppings Post-Baking
1. Melt the Cheese: After removing the bibingka from the oven, sprinkle extra cheese on top. Return the dish to the oven for an additional 5 minutes, allowing the cheese to melt beautifully.
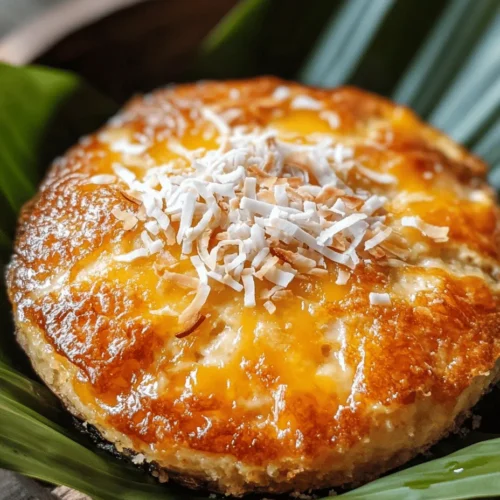
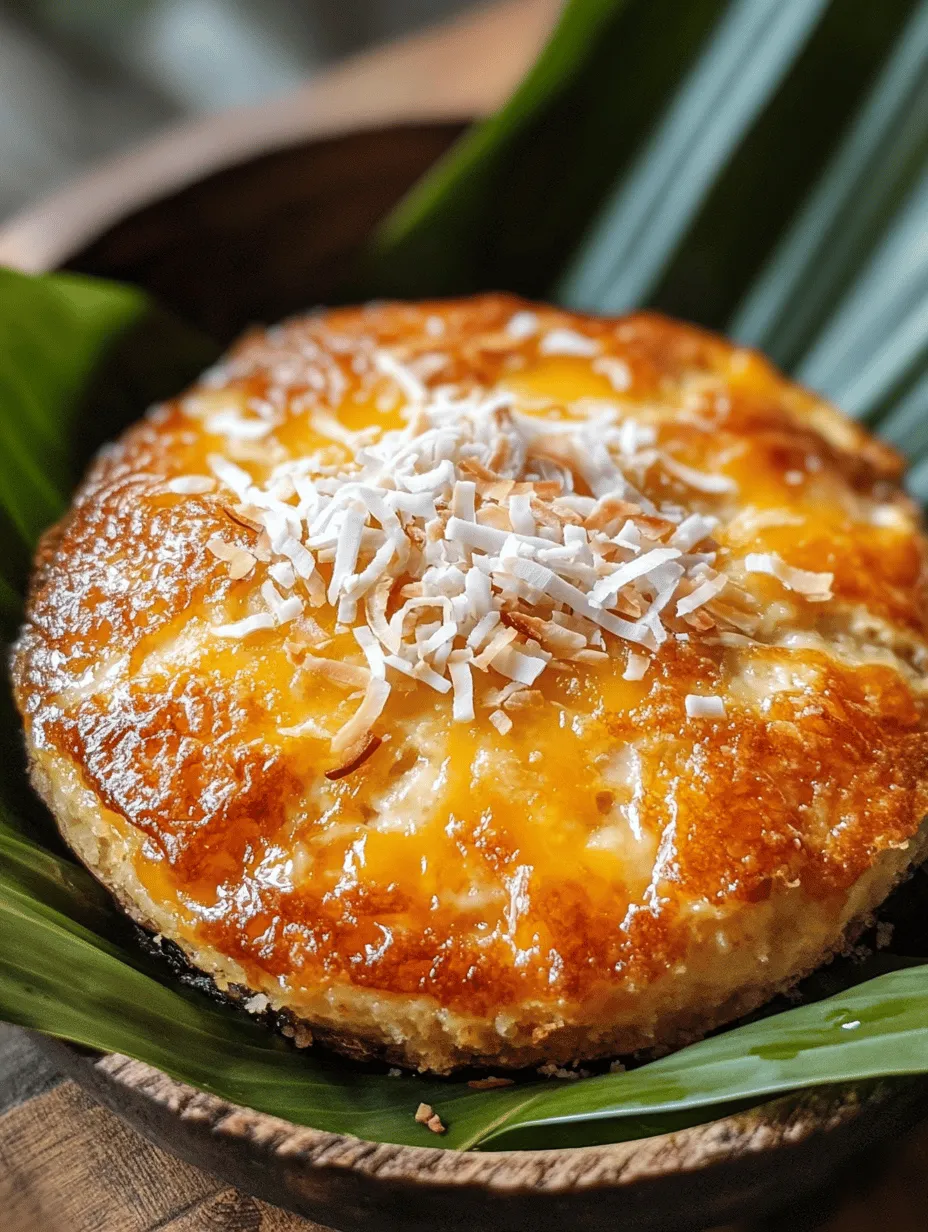
2. Garnishing: Consider adding a sprinkle of grated coconut or a drizzle of coconut cream for an extra layer of flavor and presentation.
Cooling and Serving Advice
Allow your bibingka to cool in the pan for about 15 minutes before removing it. This cooling time helps it set and makes it easier to cut. When serving, cut into wedges and garnish with coconut flakes for a visually appealing presentation.
Nutritional Information
Understanding the nutritional value of bibingka can help you enjoy this delightful treat in moderation. Here’s a quick overview:
– Calories: A standard slice of bibingka (about 100 grams) contains approximately 250-300 calories.
– Carbohydrates: Given that it’s primarily made with rice flour, bibingka is relatively high in carbohydrates, making it a fulfilling snack or dessert.
– Fats: The inclusion of coconut milk and butter contributes to its fat content, which can also be beneficial for energy.
Dietary Concerns
For those with dietary restrictions, bibingka can be adapted. Using rice flour makes it gluten-free, a great option for gluten-sensitive individuals. Additionally, you can moderate the sugar content to suit personal health goals.
Conclusion
Making and sharing bibingka is a delightful experience that not only brings the flavors of Filipino tradition to your kitchen but also creates cherished memories with loved ones. This recipe invites you to explore the rich cultural history of bibingka while savoring its unique taste. Whether you’re enjoying it as a snack, dessert, or part of a special meal, the joy of creating homemade bibingka is truly unparalleled.
We encourage you to try this recipe and bring a taste of Filipino culture into your home. With its versatility, bibingka can be enjoyed in various ways, making it a perfect addition to any gathering. Celebrate the joy of cooking and the pleasure of sharing this traditional treat with family and friends. Happy baking!