
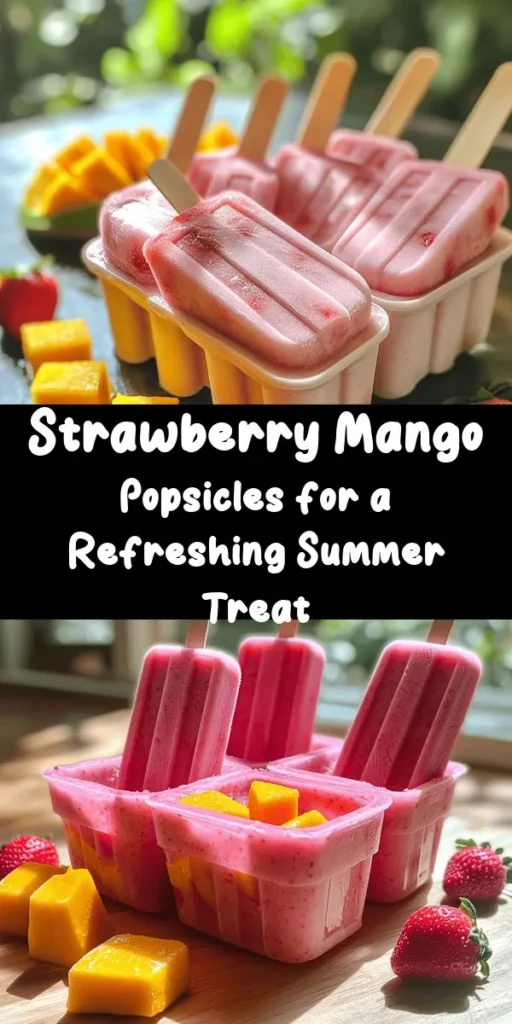
Introduction
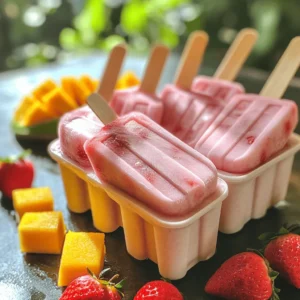
As the warm weather rolls in, the craving for refreshing treats becomes irresistible, and what better way to cool off than with homemade popsicles? Ditching store-bought options laden with artificial colors, flavors, and preservatives, more people are turning to homemade popsicles as a healthier alternative. These frozen delights not only satisfy your sweet tooth but also allow you to enjoy vibrant, fresh flavors in every bite. Among the myriad of flavor combinations you can experiment with, strawberry and mango popsicles stand out, boasting a delightful balance of sweetness and tanginess that is simply perfect for summer.
Strawberries, with their juicy texture and bright red hue, pair beautifully with the tropical allure of ripe mangoes. Together, these fruits create a refreshing treat that embodies the essence of summer in every popsicle. The best part? Making your own strawberry mango popsicles is not only easy, but it also gives you complete control over the ingredients. By opting for fresh fruits and natural sweeteners, you can create a guilt-free dessert that is both delicious and nutritious.
In this recipe, we will guide you through the steps to create your own refreshing strawberry mango popsicles, highlighting the importance of using fresh ingredients and natural sweeteners. The process is simple, allowing you to create a fun, engaging activity to enjoy with family or friends. So, roll up your sleeves, and let’s get started on this delightful summer project!
Understanding the Ingredients
To craft the perfect strawberry mango popsicles, it is essential to understand the key ingredients that will elevate your treat. Here’s a breakdown of what you’ll need and why each component is important.
Fresh Strawberries
Strawberries are not only one of the most popular fruits but also a powerhouse of nutrition. Bursting with flavor, they are low in calories and high in vitamins, particularly vitamin C, which supports a healthy immune system. Additionally, strawberries are rich in antioxidants, which help combat oxidative stress in the body, making them a fantastic choice for any healthy recipe.
When selecting strawberries for your popsicles, look for bright red berries that are firm to the touch, with a fresh green cap. Avoid any that appear dull or have soft spots, as these are signs of overripeness. To enhance their flavor, wash the strawberries gently and remove the green tops before blending.
Ripe Mangoes
Mangoes bring a tropical sweetness that pairs perfectly with strawberries. They are not only delicious but also packed with nutrients. Mangoes are an excellent source of vitamins A and C, which are crucial for healthy skin and immune function. Additionally, they provide dietary fiber, aiding digestion and contributing to overall gut health.
When choosing mangoes, look for those that yield slightly to pressure, indicating ripeness. The skin color can vary, so focus on the feel and aroma; ripe mangoes should have a sweet fragrance. To prepare, peel the mango and cut it away from the pit, then chop it into small pieces for easy blending.
Coconut Water vs. Water
In our popsicle recipe, you have the option to use coconut water or regular water as the base for your mixture. Coconut water is a fantastic hydrating ingredient, rich in electrolytes, making it an excellent choice for summer treats. It adds a subtle sweetness and a hint of tropical flavor to your popsicles.
On the other hand, if you prefer a lighter option, plain water can be used. While it may not have the same flavor profile as coconut water, it effectively dilutes the sweetness of the fruits and keeps the popsicles refreshing.
Natural Sweeteners: Honey and Maple Syrup
To enhance the sweetness of your strawberry mango popsicles, you can opt for natural sweeteners like honey or maple syrup. Both options are healthier alternatives to refined sugars and add their unique flavors to the mix.
Honey is a natural sweetener known for its numerous health benefits, including antibacterial properties and a rich supply of antioxidants. It pairs well with the fruity flavors of strawberries and mangoes. However, if you are vegan or prefer not to use honey, maple syrup is an excellent substitute. It also brings a unique, rich flavor profile and is known for its minerals and vitamins, including zinc and manganese.
When adjusting the sweetness of your popsicles, start with a small amount of your chosen sweetener and taste the mixture. You can always add more to suit your personal preference.
The Role of Fresh Lime Juice
Fresh lime juice plays a crucial role in balancing the flavors of your popsicles. The acidity from the lime juice enhances the natural sweetness of the fruits while adding a refreshing zing that elevates the overall flavor. Moreover, lime juice is rich in vitamin C and other antioxidants, providing additional health benefits to your frozen treat.
Adding lime juice is simple, but be mindful of the amount you use. A tablespoon or two is usually sufficient to brighten the flavors without overwhelming the sweetness of the strawberries and mangoes.
The Optional Pinch of Salt
Though it may seem unconventional, adding a pinch of salt to your popsicle mixture can significantly enhance the flavors. Salt works to balance sweetness and bring out the natural essence of the fruits, creating a more rounded taste. However, this addition is entirely optional and can be adjusted based on your personal preference.
Step-by-Step Guide to Making Strawberry Mango Popsicles
Now that we’ve explored the essential ingredients, it’s time to dive into the fun part: making your strawberry mango popsicles! The process is straightforward and can be completed in just a few steps. Gather your ingredients, and let’s get started!
Preparation of Ingredients
1. Wash and Prepare the Fruits: Start by washing the strawberries under cold running water. Remove the green tops and slice the strawberries into smaller pieces to make blending easier. For the mangoes, peel the skin and cut the flesh away from the pit, then chop it into smaller cubes.
2. Measure Your Ingredients: Depending on how sweet or tangy you like your popsicles, gather the following ingredients:
– 2 cups of fresh strawberries
– 2 cups of ripe mangoes
– 1 cup of coconut water (or water)
– 1-2 tablespoons of honey or maple syrup (adjust to taste)
– 1-2 tablespoons of fresh lime juice
– A pinch of salt (optional)
3. Blend the Mixture: In a blender, combine the strawberries, mangoes, coconut water (or water), honey or maple syrup, lime juice, and salt. Blend until smooth and creamy. Taste the mixture to see if it meets your sweetness preference, adjusting the sweetener or lime juice as needed.
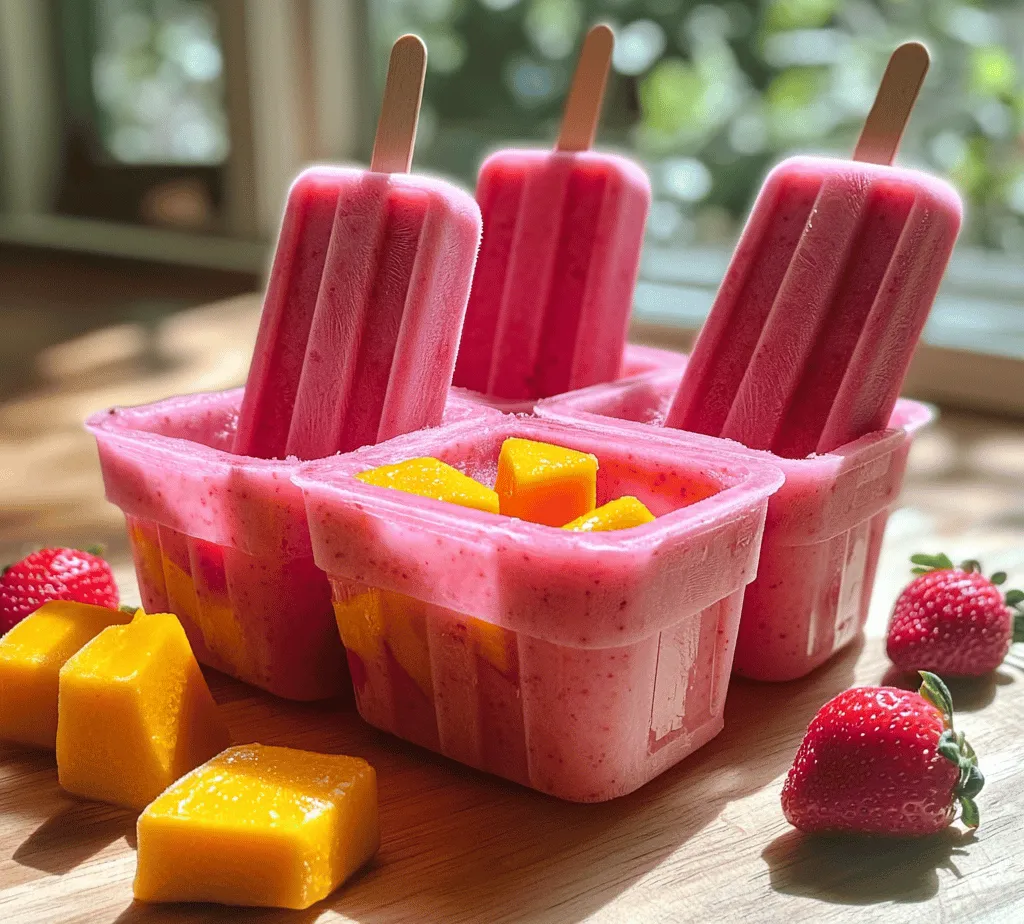
4. Pour into Popsicle Molds: Once the mixture is well-blended, carefully pour it into your popsicle molds. Leave a little space at the top of each mold to allow for expansion as they freeze.
5. Insert Sticks: If your popsicle molds come with sticks, insert them into the molds. If not, place them in the freezer for about an hour until they start to firm up, then insert wooden sticks.
6. Freeze: Place the molds in the freezer and allow them to freeze for at least 4-6 hours, or until completely solid.
By following these simple steps and using fresh, nutritious ingredients, you will have created delightful strawberry mango popsicles that are sure to impress your friends and family. In the next section, we will cover tips for achieving the best results and answer some common questions about making popsicles at home. Stay tuned for more insights into perfecting your summer treat!
Detailed Instructions on Hulling Strawberries and Dicing Mangoes
Before you embark on making your refreshing strawberry mango popsicles, it’s essential to prepare your fruits properly. Hulling strawberries and dicing mangoes may seem daunting, but with a few simple techniques, you’ll have them ready in no time.
Hulling Strawberries: Start by rinsing your strawberries under cold water. Using a sharp paring knife, gently insert the blade into the green leafy stem area of the strawberry. Angle the knife towards the center of the fruit and carefully rotate it to remove the core without wasting any fruit. This method ensures you have perfectly hulled strawberries ready for blending.
Dicing Mangoes: Mangoes are a little trickier due to their large pit. Begin by cutting off the two sides of the mango, which are closest to the pit, making two thick slices. Hold a slice in your hand, skin side down. Use a knife to score the flesh in a grid pattern, being careful not to cut through the skin. Once scored, you can scoop out the diced mango with a spoon. Repeat with the other half and then combine your diced mango with the hulled strawberries.
Blending the Mixture
Now that your fruits are prepared, it’s time to blend them into a delicious mixture. Place the hulled strawberries and diced mangoes into a high-speed blender. Add any additional ingredients you prefer, such as a splash of lime juice for extra flavor or a sweetener like honey or agave syrup if desired.
Blend the mixture on high until it reaches a smooth, creamy consistency. If you prefer a bit of texture in your popsicles, blend only until combined, leaving small chunks of fruit. The choice between a smooth or chunky texture is entirely up to you, making this recipe customizable to suit your taste.
Importance of Achieving the Right Consistency
Achieving the right consistency for your popsicle mixture is crucial for the final product. A mixture that is too thin may freeze into ice rather than a creamy popsicle, while a mixture that is too thick may not freeze properly. Aim for a consistency that is somewhat thick but pourable—similar to a smoothie. This balance is essential to ensure that the popsicles come out smooth and delicious.
Options for Texture Preferences: Smooth vs. Chunky
As mentioned earlier, your texture preference plays a significant role in how your popsicles turn out. If you enjoy a smoother popsicle, blend the mixture until it’s fully incorporated. For those who prefer a chunkier popsicle, consider adding some chopped fruit pieces to the blended mixture before pouring it into molds. This way, you’ll have delightful bites of fruit throughout your popsicle.
Taste Testing
One of the joys of making your own popsicles is the freedom to taste as you go. After blending your mixture, take a moment to taste it. This is the perfect opportunity to adjust the sweetness or acidity to your liking. If you feel it needs a little more sweetness, add a bit more sweetener and blend again. Remember, the flavors will mellow out slightly once frozen, so don’t hesitate to make it a bit bolder than you think you want!
Encouraging Readers to Customize Sweetness Levels
Everyone’s palate is different, and that’s what makes homemade popsicles so special. You can easily customize the sweetness levels according to your preference. Start with a small amount of sweetener—perhaps 1 to 2 tablespoons—and adjust from there. Keep in mind that ripe fruits like strawberries and mangoes tend to be sweeter, so you may not need much added sugar.
Importance of Tasting During the Cooking Process
Tasting during the cooking or preparation process is vital not just for sweetness but for flavor balance as well. Feel free to add a dash of vanilla extract for depth or a squeeze of lemon juice for brightness. Your popsicles should reflect your preferences, making the tasting step an essential part of the process.
Pouring Into Molds
Once your mixture is blended and seasoned to perfection, it’s time to pour it into the popsicle molds. For a clean and spill-free transfer, use a measuring cup with a spout, or a funnel, to help guide the mixture into the molds. Fill each mold to about ¾ full, leaving enough space for the mixture to expand as it freezes.
Tips for Avoiding Spills and Ensuring Even Filling
To prevent spills, consider placing your molds on a baking sheet. This not only catches any potential drips but also makes it easier to transport them to the freezer. Ensure that each mold is filled evenly to guarantee that all popsicles freeze at the same rate, leading to a uniform texture and flavor.
Inserting Popsicle Sticks
Once you’ve filled the molds, it’s time to insert the popsicle sticks. If your molds come with built-in sticks, follow the manufacturer’s instructions. For those that don’t, wait about 30-60 minutes after filling your molds before inserting the sticks. This allows the mixture to set a bit, making it easier to keep the sticks upright. Insert the sticks into the center of each mold, ensuring they are straight and centered for even freezing.
Freezing Process
Now, place the filled molds in the freezer. For best results, freeze the popsicles for at least 4 to 6 hours, or until completely solid. The freezing time may vary depending on your freezer’s temperature and the size of your molds.
Recommended Freezing Times and What to Expect
It’s best to plan ahead, as the longer you freeze the popsicles, the better they will set. After about 4 hours, you can check their firmness. If they are still soft, leave them in for an additional hour or two. You want them to be firm enough to hold their shape when removed from the molds.
Tips for Faster Freezing Without Compromising Texture
If you’re in a hurry, you can place the molds in the coldest part of your freezer to speed up the freezing process. However, avoid opening the freezer frequently, as this can raise the temperature inside and slow down the freezing.
Enjoying Your Popsicles
After hours of anticipation, it’s time to enjoy your delicious strawberry mango popsicles! But first, let’s discuss how to remove them from the molds without breakage.
How to Release Popsicles from Molds
To release your popsicles, run warm water over the outside of the molds for a few seconds. This gentle heat will help loosen the popsicles inside. Be careful not to immerse the molds completely in water, as this can cause the popsicles to melt slightly. After a few moments, gently pull on the popsicle stick while twisting slightly to help loosen it from the mold.
Serving Suggestions
For a delightful summer treat, consider serving your popsicles with fresh fruit, yogurt, or a drizzle of honey. You can also pair them with refreshing drinks like iced tea or lemonade for a complete summer experience.
Presentation Tips for a Visually Appealing Treat
To make your popsicles even more attractive, consider garnishing them with fresh mint leaves or a sprinkle of coconut flakes. You can also serve them in a colorful bowl or on a platter surrounded by sliced fruits for a beautiful presentation. This not only elevates the visual appeal but also makes for a lovely centerpiece at summer gatherings.
Storage and Shelf Life
If you find yourself with leftover popsicles, proper storage is key to maintaining their freshness. Place the popsicles in an airtight container or wrap them in plastic wrap to prevent freezer burn.
How to Properly Store Popsicles for Optimal Freshness
When storing, make sure that the popsicles are completely frozen solid before transferring them to a container. This helps preserve texture and flavor.
Information on How Long the Popsicles Can Be Kept in the Freezer
Homemade popsicles can be stored in the freezer for up to 2 months without significant loss of flavor or texture. However, for the best taste and quality, it’s recommended to consume them within the first month.
Discussion on Potential Changes in Texture or Flavor Over Time
Over time, popsicles may experience slight changes in texture or flavor due to freezer burn or prolonged exposure to air. To minimize this, ensure that they are properly sealed and stored. If you notice any ice crystals forming on the surface, it’s best to consume them sooner rather than later.
Conclusion
Making homemade strawberry mango popsicles is not only an easy and enjoyable activity, but it also allows you to create a refreshing treat that is free from preservatives and artificial flavors. With just a few simple ingredients and steps, you can indulge in a healthy dessert that is perfect for those hot summer days.
Feel free to experiment with different fruits and flavors, such as adding bananas, coconut, or even a hint of chili for a spicy twist. The possibilities are endless, and each batch can be a new adventure in flavor.
Embrace the joy of creating your own popsicles, and let them become a staple in your summer repertoire. Enjoy the health benefits of fresh fruit while treating yourself to a delightful snack that is sure to satisfy your sweet tooth. So grab your ingredients, follow the steps, and make this summer unforgettable with your homemade popsicles!