
Introduction
In recent years, the art of homemade bread has surged in popularity, captivating home bakers and culinary enthusiasts alike. As people seek comfort in cooking, the allure of kneading dough and watching it rise has transformed kitchens into warm, inviting spaces. Bread is not just a staple food; it embodies tradition, creativity, and a sense of accomplishment. Among the many variations of bread that one can make, the Clover-Shaped Bread Bowl stands out as an innovative and playful option. This charming bread bowl serves as both a vessel and a treat, perfect for serving a variety of dishes while adding a unique flair to any table setting.
The Clover-Shaped Bread Bowl is more than just a functional piece for serving; it is a delightful centerpiece that can elevate gatherings, special occasions, and even everyday meals. Whether you’re hosting a dinner party or simply enjoying a cozy family meal, these bread bowls can be filled with savory soups, creamy dips, or fresh salads, making them a versatile choice for any culinary creation. The clover shape not only adds visual appeal but also invites creativity in presentation, allowing you to impress your guests with both taste and aesthetics.
In this article, we will explore the fundamentals of bread making, delve into the unique charm of clover-shaped bread bowls, and provide you with a detailed ingredient breakdown to ensure your baking experience is both enjoyable and successful.
Understanding the Basics of Bread Making
Before we dive into the specifics of the Clover-Shaped Bread Bowl recipe, it’s essential to understand the key ingredients that form the foundation of bread making. Each component plays a vital role in the overall structure, flavor, and texture of the finished product.
All-Purpose Flour: The Foundation of Bread
At the heart of any bread recipe is all-purpose flour. This versatile ingredient contains a balanced amount of protein, making it suitable for various types of bread. The protein in flour, primarily glutenin and gliadin, combines with water to form gluten, which gives bread its structure and elasticity. When kneading the dough, gluten strands develop, allowing the bread to rise and hold its shape. For our Clover-Shaped Bread Bowl, using high-quality all-purpose flour will ensure a light and fluffy texture, providing the perfect vessel for your favorite fillings.
The Role of Instant Yeast in Fermentation
Yeast is the magic ingredient that makes bread rise and gives it that delightful airy texture. Instant yeast, in particular, is favored for its quick activation and ability to work without the need for proofing. It can be mixed directly into the dry ingredients, making the bread-making process more efficient. Instant yeast ferments the sugars present in the dough, producing carbon dioxide gas that causes the dough to expand. For our clover-shaped bowls, using instant yeast will help achieve a light and airy crumb that complements the bread’s unique shape.
Importance of Salt and Sugar in Flavor and Texture
Salt is a critical component in bread making, serving a dual purpose. Not only does it enhance the overall flavor of the bread, but it also helps control the fermentation process. Salt strengthens gluten structure, making the dough more elastic and easier to shape. Additionally, it slows down yeast activity, preventing the dough from rising too quickly, which can lead to undesirable textures.
Sugar, on the other hand, plays a different but equally important role. While it adds sweetness, its primary function in bread making is to activate yeast. When yeast consumes sugar, it produces carbon dioxide, contributing to the dough’s rise. Sugar also aids in browning, creating a beautiful golden crust as the bread bakes. In our Clover-Shaped Bread Bowl recipe, the combination of salt and sugar will enhance the flavor while ensuring a perfect texture.
Overview of the Fermentation Process and Its Significance
The fermentation process is a critical stage in bread making that significantly impacts the flavor and texture of the final product. During fermentation, yeast consumes sugars and produces carbon dioxide and alcohol, which contribute to the dough’s rise and flavor complexity. This process can take anywhere from a few hours to overnight, depending on the recipe and conditions.
In the case of our Clover-Shaped Bread Bowl, allowing the dough to ferment properly will result in a lighter, airier bread with a more pronounced flavor. The first rise, known as bulk fermentation, allows the dough to develop flavor and structure, while the second rise, or proofing, helps achieve the desired shape. Understanding and respecting the fermentation process is key to mastering bread making and achieving the perfect clover-shaped bowl.
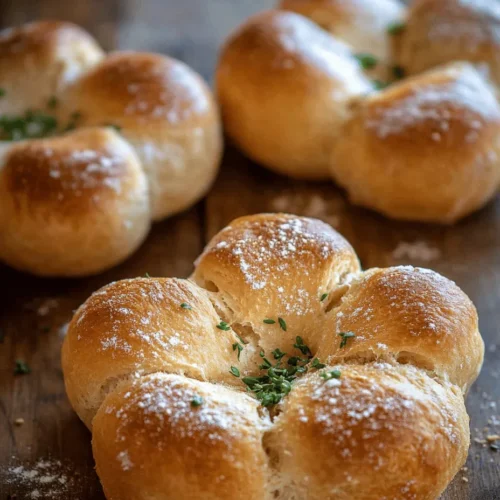
The Unique Charm of Clover-Shaped Bread Bowls
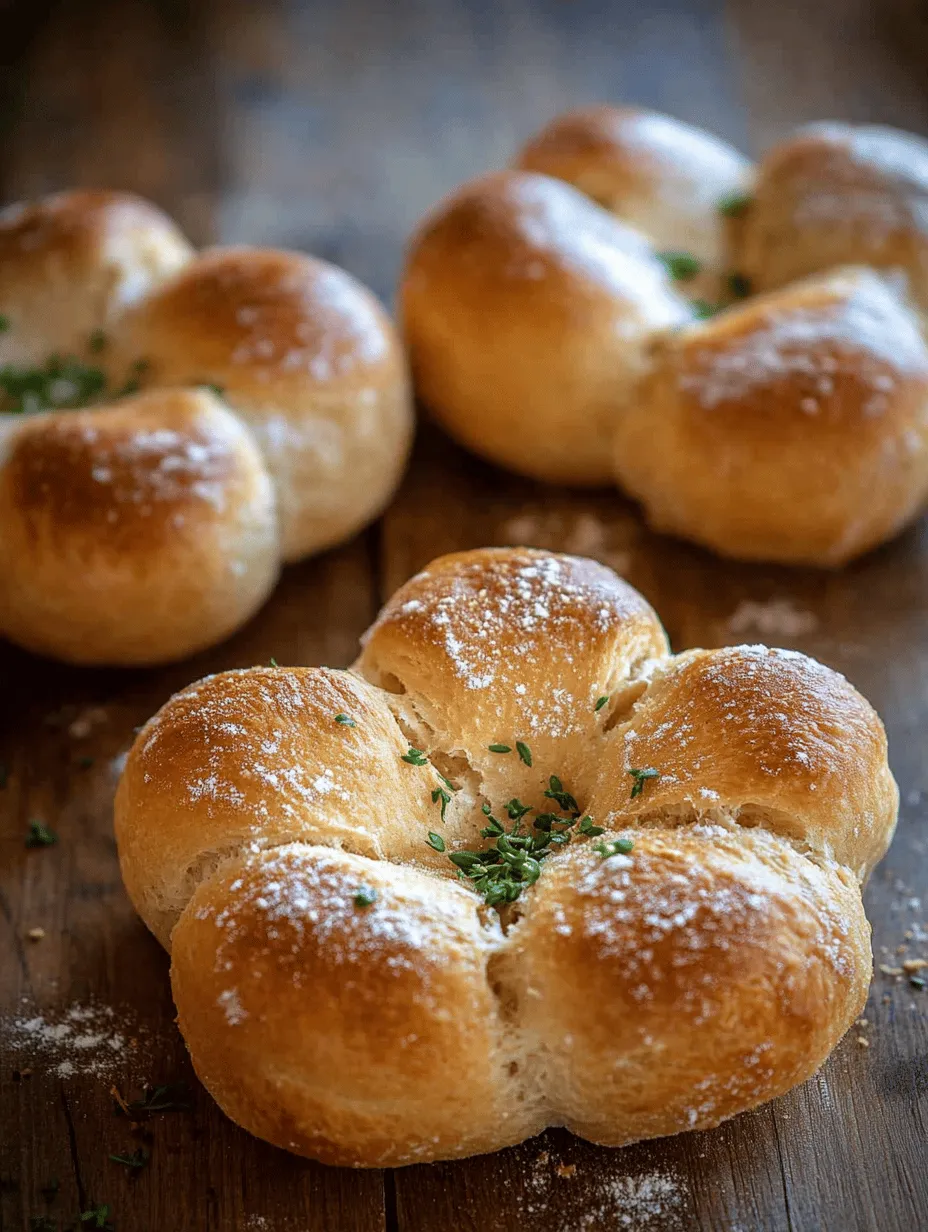
What sets the Clover-Shaped Bread Bowl apart from traditional bread loaves is its unique shape and presentation. The clover shape, resembling a four-leaf clover, is not only visually appealing but also functional. Each petal of the clover can be torn off and used for dipping or scooping, making it an interactive and fun way to enjoy your meal.
Bread bowls have a long-standing cultural significance in various cuisines around the world. From the iconic sourdough bowls filled with clam chowder in San Francisco to the hearty rye bread bowls served with stews in Eastern Europe, bread has been utilized as an edible vessel for centuries. The Clover-Shaped Bread Bowl pays homage to this tradition while adding a modern twist, making it a perfect choice for gatherings, brunches, or any occasion where food and company come together.
The versatility of clover-shaped bread bowls is another reason for their appeal. They can be filled with a wide range of dishes, from creamy soups to spicy dips, fresh salads, and even desserts. This adaptability allows you to showcase your culinary creativity, impressing your guests with a delicious and beautiful presentation. Whether you’re serving a comforting tomato bisque or a vibrant spinach dip, the clover-shaped bowl will enhance the dining experience.
Ingredients Breakdown
Now that we’ve covered the basics of bread making and the unique charm of Clover-Shaped Bread Bowls, let’s take a closer look at the specific ingredients you’ll need to bring this recipe to life.
All-Purpose Flour: Importance in Bread Structure
As previously mentioned, all-purpose flour is the backbone of our Clover-Shaped Bread Bowl. When choosing flour, opt for a high-quality brand that has a protein content around 10-12%. This protein level provides the ideal balance for creating a light and airy texture while still maintaining the structure necessary for shaping the clover design. For best results, consider measuring your flour by weight rather than volume to ensure accuracy.
Instant Yeast: Advantages Over Active Dry Yeast
Instant yeast is the star of our recipe due to its ease of use and reliable results. Unlike active dry yeast, which requires proofing in warm water before use, instant yeast can be added directly to the dry ingredients. This not only simplifies the process but also allows for faster preparation. Instant yeast is also more potent than active dry yeast, meaning you can achieve a good rise even with shorter fermentation times.
Salt: Enhancing Flavor and Controlling Fermentation
Salt is an essential ingredient that should never be overlooked in bread making. For our Clover-Shaped Bread Bowl, a fine sea salt or kosher salt is recommended. Salt not only enhances the flavor of the bread but also strengthens the gluten structure, resulting in a better rise. Additionally, it helps regulate yeast activity, allowing for a controlled fermentation process. Be cautious not to skip or reduce the salt in your recipe, as it plays a crucial role in achieving the desired flavor and texture.
Sugar: Not Just for Sweetness, but for Yeast Activation
While sugar does add a touch of sweetness to the bread, its primary role is to feed the yeast and promote fermentation. For our Clover-Shaped Bread Bowl, granulated sugar is commonly used. The small amount of sugar in the recipe helps activate the yeast, ensuring a strong rise and an overall light texture. If you’re looking to make a more savory bread bowl, you can reduce the sugar slightly, but keep in mind that a small amount is necessary for optimal yeast performance.
In the next part of this article, we will outline the step-by-step instructions for making your Clover-Shaped Bread Bowl, along with helpful tips to ensure your baking experience is a success. Stay tuned as we guide you through the delightful process of creating this unique and charming addition to your dining table!
Olive Oil: Adding Moisture and Richness
In the world of bread baking, olive oil is more than just a cooking fat; it is a key ingredient that significantly enhances the flavor and texture of your Clover-Shaped Bread Bowl. By incorporating olive oil, you add moisture, which contributes to a tender crumb and a rich, slightly fruity flavor profile. This ingredient also helps to create a lovely crust during the baking process, as it promotes browning and imparts a delightful aroma.
When selecting your olive oil, opt for extra virgin if possible, as it offers the best flavor and health benefits. You don’t need to go overboard; about two tablespoons will suffice for this recipe. If you want to elevate the taste even further, consider infusing your olive oil with herbs or garlic before adding it to the dough.
Optional Ingredients (Garlic Powder and Dried Herbs): Enhancing Flavor Profiles
To amplify the flavor of your Clover-Shaped Bread Bowl, consider including optional ingredients like garlic powder and dried herbs. These additions can transform a simple bread bowl into a savory delight.
Garlic powder can add a subtle yet satisfying depth of flavor, making it perfect for pairing with creamy soups or hearty dips. Dried herbs, such as oregano, thyme, or rosemary, lend an aromatic quality that complements many fillings. A teaspoon of garlic powder and a teaspoon of your chosen dried herb can be mixed into the dry ingredients to ensure an even distribution throughout the dough.
Step-by-Step Instructions to Craft Your Clover-Shaped Bread Bowl
Mixing the Ingredients and Achieving the Right Consistency
1. Gather Your Ingredients: Start with the essentials: flour, yeast, salt, water, and olive oil. If you’re using garlic powder or dried herbs, have those ready as well.
2. Combine Dry Ingredients: In a large mixing bowl, whisk together 3 cups of all-purpose flour, 1 packet (2 ¼ teaspoons) of instant yeast, and 1 teaspoon of salt. If you’re using garlic powder and dried herbs, add them to the mix at this stage.
3. Add Wet Ingredients: Create a well in the center of the dry ingredients. Pour in 1 cup of lukewarm water and 2 tablespoons of olive oil.
4. Mixing: Use a wooden spoon or spatula to mix the ingredients until a shaggy dough begins to form. The dough should be slightly sticky but not overly wet. If it feels too sticky, gradually add more flour, a tablespoon at a time, until you achieve the right consistency.
Kneading Techniques for Optimal Dough Texture
5. Kneading the Dough: Transfer the dough onto a lightly floured work surface. Knead the dough for about 8-10 minutes, until it becomes smooth and elastic. To knead, fold the dough over itself, then push it away with the heel of your hand. Rotate and repeat.
6. Windowpane Test: To check if the dough is adequately kneaded, perform the windowpane test. Take a small piece of dough and stretch it gently; if it can stretch thin enough to let light through without tearing, it’s ready for the next step.
Importance of Rising Time and How to Check for Readiness
7. First Rise: Place the kneaded dough into a lightly oiled bowl, cover it with a damp cloth or plastic wrap, and let it rise in a warm place for about 1-2 hours, or until it has doubled in size. The ideal rising temperature is between 75°F and 80°F.
8. Testing for Readiness: To ensure the dough has risen sufficiently, gently poke it with a finger. If the indentation remains, the dough is ready for the next step. If it springs back, it needs more time to rise.
Shaping the Dough into Clover Forms: Tips for Achieving Perfect Petals
9. Dividing the Dough: Once the dough has risen, punch it down to release air bubbles, then turn it out onto a floured surface. Divide the dough into equal pieces—about 8 to 12 pieces, depending on how large you want your clover-shaped bowls.
10. Shaping the Petals: Roll each piece of dough into a smooth ball. Then, for each clover bowl, take three balls and arrange them in a clover shape on a baking sheet lined with parchment paper. Make sure they are close but not touching, allowing room for expansion as they rise and bake.
11. Final Rise: Cover the shaped dough loosely with a kitchen towel and let it rise for another 30-45 minutes until they puff up.
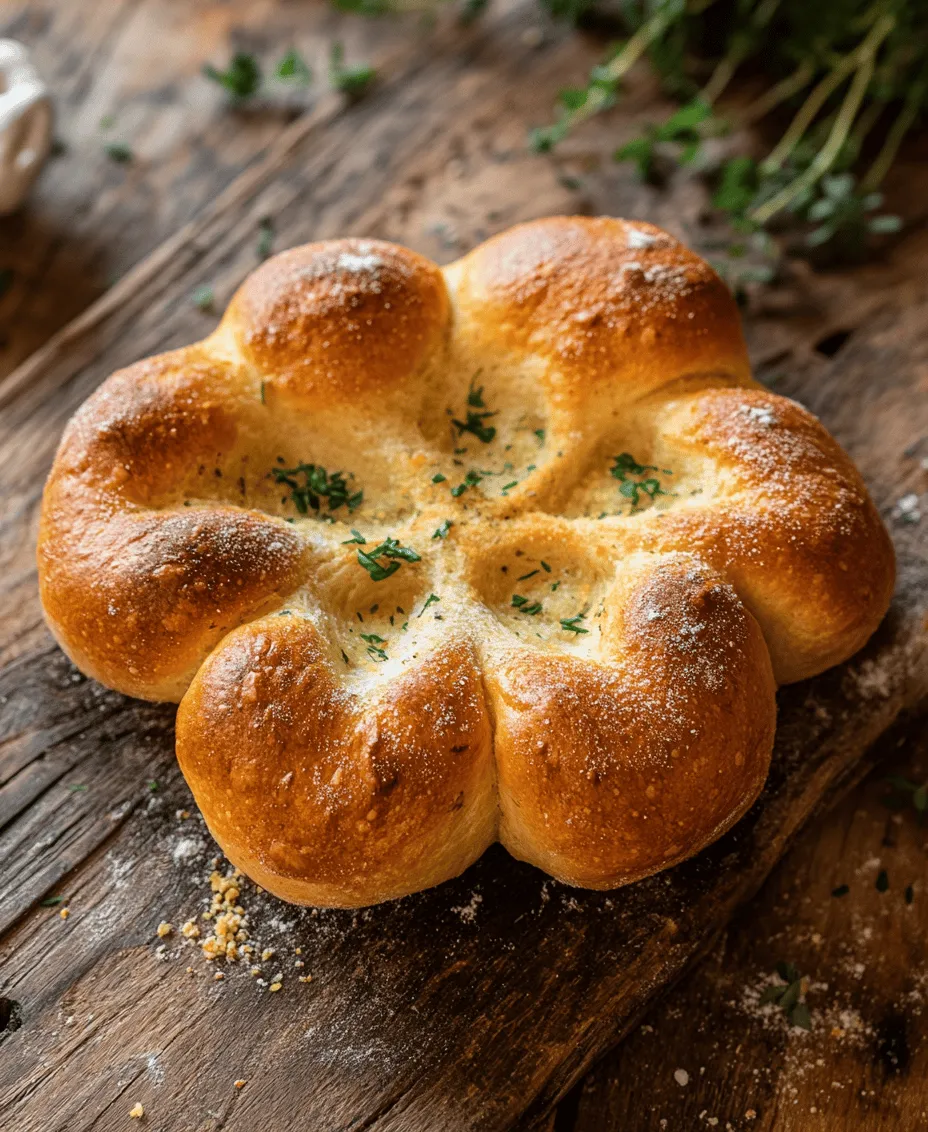
Baking Tips for Achieving Golden Brown Perfection
12. Preheat the Oven: While the dough undergoes its second rise, preheat your oven to 375°F (190°C).
13. Baking: Once ready, place the baking sheet in the oven and bake for 20-25 minutes, or until the tops are golden brown and the bread sounds hollow when tapped on the bottom.
14. Cooling: Remove the bread bowls from the oven and let them cool on a wire rack. Allow them to cool completely before filling them.
Serving Suggestions and Pairings
Your Clover-Shaped Bread Bowls are not just visually appealing; they also provide a delicious vessel for a variety of fillings. Here are some creative ideas for serving:
– Soups: These bread bowls are perfect for serving creamy soups like tomato bisque, broccoli cheddar, or clam chowder. The bread absorbs the flavors of the soup, making each bite delightful.
– Dips: Serve with warm spinach and artichoke dip, a cheesy onion dip, or even a classic hummus. Guests can tear off pieces of the bread bowl to enjoy with the dip.
– Creative Fillings: For a festive gathering, consider filling the bowls with a hearty beef stew, chili, or even a layered salad for a fresh twist. The versatility of the bread bowl allows you to get creative with your fillings.
– Leftover Ideas: If you have leftover bread bowls, consider cutting them into pieces and toasting them for croutons or using them as breadcrumbs for a crunchy topping on casseroles or salads.
Storage and Reheating
To enjoy your Clover-Shaped Bread Bowls beyond the day of baking, proper storage is essential:
– Storing: Allow the bread bowls to cool completely, then wrap them tightly in plastic wrap or store them in an airtight container. They can be kept at room temperature for up to two days.
– Reheating: To reheat, preheat your oven to 350°F (175°C). Place the bread bowls on a baking sheet and warm them in the oven for about 10-15 minutes until they are heated through. This method helps maintain their fresh-baked texture.
– Repurposing Stale Bread: If your bread bowls become stale, don’t throw them away! Instead, cut them into cubes, toss them with olive oil and seasonings, and bake them at 375°F (190°C) for about 10-15 minutes to make delicious croutons. Alternatively, blend stale bread into fine crumbs to use in recipes that call for breadcrumbs.
Conclusion
Baking your own Clover-Shaped Bread Bowls is a rewarding culinary experience that brings joy to both the baker and those who enjoy the finished product. The combination of a tender, flavorful dough and the fun clover shape makes these bread bowls a perfect addition to any meal or gathering.
Don’t hesitate to experiment with different variations and fillings that suit your taste preferences. Whether you stick with the classic recipes or get adventurous with new flavors, the process of making bread is a gratifying journey. So roll up your sleeves, gather your ingredients, and embrace the art of bread baking—it’s an adventure filled with warmth, creativity, and, of course, deliciousness.