

Introduction
In today’s fast-paced world, healthy snack options are more important than ever. Granola bars have gained immense popularity as a convenient and nutritious choice for those on the go. Whether you’re rushing out the door to work, heading to the gym, or simply in need of a quick pick-me-up, granola bars provide an ideal balance of taste and nutrition. This recipe for Easiest Microwave Chewy Peanut Butter Granola Bars is designed with simplicity and convenience in mind, making it perfect for busy lifestyles.
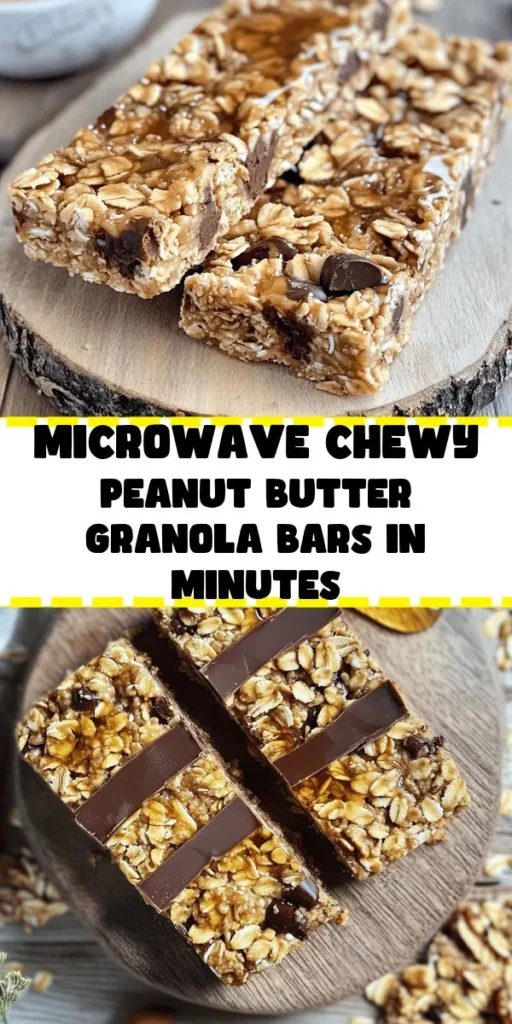
What sets this recipe apart is its ease of preparation. With just a few ingredients and minimal cooking time, you can whip up a batch of chewy granola bars that are not only delicious but also packed with wholesome goodness. The main ingredients—oats and peanut butter—are known for their health benefits, making this snack a guilt-free indulgence.
Peanut butter is a fantastic source of protein and healthy fats, while oats offer dietary fiber that supports digestive health and sustained energy levels. Together, they create a satisfying snack that can keep you energized throughout the day. Plus, making your own granola bars at home allows you to control the ingredients, ensuring you know exactly what you’re consuming.
Understanding Granola Bars
Granola bars are essentially a mix of oats, nuts, seeds, and sweeteners, compressed into a portable form. They are incredibly versatile, allowing for endless customization based on personal preferences and dietary needs. You can add different nuts, dried fruits, or even chocolate to create a flavor profile that suits your taste. This adaptability makes granola bars a favorite among health-conscious individuals and families alike.
One of the primary advantages of making homemade granola bars is the nutritional benefits they offer compared to store-bought options. Many commercially available granola bars are loaded with added sugars, preservatives, and unhealthy fats. By preparing your own bars, you can use natural ingredients and adjust the sweetness to your liking, resulting in a healthier snack without sacrificing flavor.
Common ingredients found in granola bars include rolled oats, various nuts and seeds, sweeteners like honey or maple syrup, and flavorings such as vanilla extract. Each component plays a vital role in both the texture and taste of the bars, contributing to their overall appeal.
Why Microwave Granola Bars?
The method of preparing granola bars in the microwave offers several distinct advantages over traditional baking methods. First and foremost, using a microwave significantly reduces preparation time. Instead of preheating an oven and waiting for the bars to bake, you can have your granola bars ready in just a matter of minutes. This time-saving aspect makes them an excellent choice for those who may not have the luxury of spending hours in the kitchen.
Moreover, microwave granola bars are beginner-friendly and can be an enjoyable activity to include children in the cooking process. With minimal steps involved, little ones can assist in measuring ingredients, mixing, and even pressing the mixture into the pan. This hands-on experience not only fosters a love for cooking but also helps children understand the importance of healthy eating.
The ease of preparation is just one of the many reasons why microwave granola bars have become a popular choice among home cooks. They offer a practical solution for busy families while still delivering a nutritious and delicious snack.
Ingredients Breakdown
To create these Easiest Microwave Chewy Peanut Butter Granola Bars, you will need the following ingredients:
Rolled Oats
Rolled oats serve as the foundation of the granola bars. They are an excellent source of dietary fiber, providing the bulk and texture that make these bars satisfying. The fiber in oats helps to keep you full for longer and supports digestive health. Additionally, oats are rich in antioxidants and have been linked to various health benefits, including reduced cholesterol levels and improved heart health.
Creamy Peanut Butter
Peanut butter adds a rich, nutty flavor and contributes to the chewy texture of the bars. It is packed with protein, making it an ideal ingredient for a snack that aims to provide energy and satiety. Moreover, peanut butter contains healthy fats that are essential for overall health. When selecting peanut butter, consider opting for a natural variety without added sugars or hydrogenated oils to maximize health benefits.
Honey or Maple Syrup
Both honey and maple syrup are natural sweeteners that bring a touch of sweetness to the granola bars. Honey is known for its antioxidant properties and has been used for its health benefits for centuries. Maple syrup, on the other hand, contains minerals like manganese and zinc. Using these sweeteners not only enhances flavor but also offers additional health benefits compared to refined sugars.
Brown Sugar
Brown sugar adds moisture and a hint of caramel flavor to the granola bars. It helps bind the ingredients together, ensuring a chewy texture. While it does contain some molasses, which provides trace minerals, moderation is key, as brown sugar is still a form of added sugar.
Vanilla Extract
Vanilla extract is the secret ingredient that elevates the flavor profile of the granola bars. Just a small amount can make a noticeable difference, adding warmth and depth to the overall taste. Opting for pure vanilla extract over imitation vanilla can enhance the flavor and quality of the bars.
Salt
A pinch of salt may seem like a small detail, but it plays a crucial role in balancing the sweetness of the other ingredients. It enhances the overall flavor and prevents the bars from tasting overly sweet.
Optional Ingredients
To customize your granola bars further, consider adding optional ingredients such as chocolate chips, nuts, seeds, or dried fruits. Chocolate chips can add a delightful sweetness and indulgence, while nuts and seeds contribute healthy fats and additional protein. Dried fruits like cranberries, raisins, or apricots provide natural sweetness and chewiness. These optional ingredients not only enhance the flavor but also increase the nutritional value of the bars.
Step-by-Step Instructions
Now that you have a thorough understanding of the ingredients and their benefits, let’s dive into the step-by-step instructions for making Easiest Microwave Chewy Peanut Butter Granola Bars. This straightforward process ensures that you can quickly create your own delicious snack.
Step 1: Gather Your Ingredients
Begin by gathering all the necessary ingredients. This will make the preparation process smoother and more efficient. Measure out the rolled oats, creamy peanut butter, honey or maple syrup, brown sugar, vanilla extract, and salt. If you plan to add any optional ingredients like chocolate chips or dried fruit, have those ready as well.
Step 2: Combine the Wet Ingredients
In a microwave-safe bowl, combine the creamy peanut butter, honey (or maple syrup), brown sugar, and vanilla extract. Using a spatula, mix the ingredients until well combined. If the peanut butter is too thick, you can microwave the mixture for about 15 seconds to soften it, making it easier to blend.
Step 3: Mix in the Dry Ingredients
Once the wet ingredients are thoroughly mixed, gradually add the rolled oats and salt to the bowl. Stir the mixture until the oats are evenly coated with the peanut butter mixture. If you’re adding any optional ingredients, now is the time to fold them in.
Step 4: Press the Mixture into a Pan
Prepare an 8×8-inch microwave-safe dish by lining it with parchment paper or lightly greasing it. Pour the granola mixture into the dish and use the back of a spatula or your hands to press it down firmly. Ensuring that the mixture is compact will help the bars hold together once cooled.
Step 5: Microwave the Mixture
Place the dish in the microwave and heat on high for about 1-2 minutes. The cooking time may vary depending on your microwave’s wattage, so start with 1 minute and check the mixture. It should be slightly firm to the touch but not overcooked. If using a lower wattage microwave, you may need to adjust the time accordingly.
Step 6: Let It Cool
Once heated, remove the dish from the microwave and allow it to cool at room temperature for at least 30 minutes. This cooling period is essential for the bars to set properly. Once cooled, you can lift the granola out of the dish using the parchment paper.
Step 7: Cut into Bars
Using a sharp knife, cut the granola into bars or squares of your desired size. Store the bars in an airtight container at room temperature or in the refrigerator for an extended shelf life.
With these simple steps, you can create delicious and nutritious Easiest Microwave Chewy Peanut Butter Granola Bars that are perfect for snacking at home or on the go. Enjoy the process, and feel free to get creative with your ingredient choices!

Mixing the Ingredients: Tips for Achieving the Right Consistency
To create the perfect chewy peanut butter granola bars, achieving the right consistency with your mixture is essential. Start by combining your dry ingredients—rolled oats, nuts, seeds, and any spices you wish to include—in a large mixing bowl. This ensures that everything is evenly distributed before you add the wet ingredients.
The key to a successful mixture is the ratio of wet to dry components. For this recipe, the peanut butter and sweetener (honey or maple syrup) should be combined in a separate bowl and heated slightly in the microwave to make them easier to mix. This step not only helps in blending but also enhances the flavors. Combine the warm mixture with your dry ingredients gradually, stirring continuously until you achieve a sticky yet cohesive consistency. If the mixture feels too dry, add a splash of water or a bit more peanut butter to help bind the ingredients together.
Microwave Heating: Importance of Stirring and Watching for Melting
When heating your peanut butter and sweetener mixture in the microwave, it is important to monitor the heating process closely. Start with 30 seconds and stir the mixture well after each interval. You want the peanut butter to be melted enough to mix easily but not so hot that it becomes too runny. Ideally, you should aim for a smooth, pourable consistency, which can be achieved by heating it in short bursts. Stirring is crucial; it helps distribute the heat evenly throughout the mixture and prevents any burning at the bottom.
Adding Extras: How to Incorporate Optional Ingredients Effectively
One of the best aspects of making your own granola bars is the ability to customize them to your liking. If you want to add extras such as chocolate chips, dried fruits (like cranberries or apricots), or seeds (like chia or flaxseeds), make sure to fold them in gently after combining your base ingredients. This will ensure that they are evenly distributed without compromising the mixture’s integrity.
For a more sophisticated flavor profile, consider adding spices such as cinnamon, nutmeg, or even a dash of vanilla extract. These can enhance the overall taste and make your granola bars even more enjoyable.
Preparing the Pan: Techniques for Lining and Greasing
Preparing your pan is a critical step in ensuring your granola bars come out easily after baking. To prevent sticking, line an 8×8 inch square pan with parchment paper, leaving some overhang on the sides. This will allow you to lift the bars out of the pan easily once they have set. If you don’t have parchment paper, you can lightly grease the pan with a bit of coconut oil or cooking spray to ensure easy removal.
Make sure to press the parchment paper firmly into the corners and sides of the pan. This will help maintain the shape of the bars and prevent them from losing their form during the cooling process.
Spreading the Mixture: Ensuring Even Distribution and Firmness
Once your mixture is ready, it’s time to transfer it to the prepared pan. Using a spatula or the back of a spoon, spread the mixture evenly across the pan. It is important to pack the mixture down firmly to create a compact bar that will hold together when cut. The more tightly you pack it, the chewier and sturdier your bars will be. Take a few extra moments to ensure that the mixture is evenly distributed, reaching all corners of the pan.
Chilling and Setting: Importance of Cooling and Refrigeration for Texture
After spreading the mixture into the pan, the next step is to chill it. Place the pan in the refrigerator for at least two hours or until the mixture is completely set. This cooling period allows the flavors to meld and the bars to firm up, making them easier to cut. If you’re in a hurry, you can place them in the freezer for about 30 minutes, but be careful not to freeze them completely, as this could affect the texture.
Cutting the Bars: Suggestions for Achieving Neat, Uniform Bars
Once your granola bars are set, it’s time to cut them into portions. Use a sharp knife coated with a bit of cooking spray to make the cutting process smoother. Start by cutting the bars into squares or rectangles, depending on your preferred serving size. For neat edges, make sure to wipe the knife clean between cuts. If you have left overhang from the parchment paper, use it to lift the bars out of the pan for easier cutting.
To store the bars, consider wrapping each one individually in plastic wrap or parchment paper. This will help maintain their freshness and make them easy to grab as a quick snack.
Storage and Shelf Life
Best Practices for Storing Granola Bars to Maintain Freshness
To keep your homemade granola bars fresh, store them in an airtight container. If you plan to consume them within a week, they can be kept at room temperature. However, for extended freshness, refrigeration is advised. You can also freeze them if you’d like to keep them for longer periods.
Recommendations for Storing at Room Temperature vs. Refrigeration
At room temperature, granola bars can remain fresh for about a week. However, if your kitchen tends to be warm, it’s better to refrigerate them. When stored properly in the fridge, they can last for up to two weeks. For freezing, simply place them in a freezer-safe container or bag, separated by parchment paper to prevent sticking, and they can last for up to three months.
Discussion on the Shelf Life of Homemade Granola Bars and Signs of Spoilage
The shelf life of homemade granola bars can vary based on the ingredients used. Always check for signs of spoilage such as an off smell, discoloration, or mold. If you notice any of these, it’s best to discard the bars. Freshness is key to enjoying these tasty snacks.
Nutritional Information
Overview of the Nutritional Content per Serving
Each serving of your homemade chewy peanut butter granola bars offers a delightful blend of carbohydrates, proteins, and healthy fats. A typical bar contains around 150-200 calories, depending on the specific ingredients used. They provide a healthy dose of fiber from the oats and nuts, which is important for digestive health.
Comparison with Store-Bought Granola Bars in Terms of Calories, Sugar, and Ingredients
When compared to store-bought granola bars, these homemade options often contain fewer preservatives and artificial ingredients. Many commercial brands are high in sugars and unhealthy additives. For instance, while a single store-bought granola bar can pack in over 200 calories and up to 15 grams of sugar, your homemade version allows you to control the sweetness and overall calorie count.
Health Benefits of Incorporating Granola Bars into a Balanced Diet
Incorporating granola bars into your daily diet can provide quick energy, making them ideal for pre- or post-workout snacks. They are also an excellent option for breakfast on the go or an afternoon pick-me-up. With wholesome ingredients, these bars support energy levels and provide essential nutrients, making them a smart choice for a balanced diet.
Customizing Your Granola Bars
Suggestions for Variations in Flavors and Textures
Creating variations of your granola bars is easy and fun. Here are a few suggestions to consider:
– Different Nut Butters: While peanut butter is the star of this recipe, try substituting with almond or cashew butter for a different taste profile.
– Substituting Sweeteners: Experiment with different sweeteners such as agave nectar, brown rice syrup, or even stevia for a sugar-free version.
– Incorporating Spices: Add warmth and flavor by mixing in spices like cinnamon, nutmeg, or even cocoa powder for a chocolate-hazelnut twist.
Conclusion
In conclusion, making your own chewy peanut butter granola bars is not only easy but also allows for customization to suit your taste preferences and dietary needs. These bars are a healthy alternative to store-bought versions, packed with nutrients and free from unwanted additives. Don’t hesitate to experiment with different ingredients, share your creations with family and friends, and enjoy the satisfaction of crafting a delicious and nutritious snack tailored just for you. Whether you’re on the go or simply looking for a wholesome treat, these granola bars are sure to satisfy. Happy snacking!
