
Introduction
Fluffy Arabic bread, often referred to as Khubz or Pita, is more than just a staple in Middle Eastern cuisine; it is a cherished tradition that has been passed down through generations. Known for its soft, pillowy texture and versatile nature, this bread serves as an ideal accompaniment to a variety of dishes, from flavorful dips like hummus and baba ghanoush to grilled meats and fresh salads. In this article, we will delve into the fascinating origins of Arabic bread, provide a detailed recipe for making it from scratch, and share culinary techniques to ensure a fluffy and delicious result that will impress your family and friends.
Understanding Arabic Bread
The Cultural Significance of Arabic Bread
Arabic bread has a long and storied history that dates back thousands of years. It is believed to have originated in the Fertile Crescent, an area that encompasses parts of modern-day Iraq, Syria, Lebanon, Israel, and Jordan. The simplicity of its ingredients—primarily flour, water, salt, and yeast—makes it accessible to many, which is why it has become a staple across the Middle East and beyond.
In Middle Eastern culture, bread is not just a food item; it is a symbol of hospitality and community. It is often served with meals as a means of sharing and bringing people together. Variants of Arabic bread can be found throughout the region, each reflecting the local ingredients and culinary traditions. For instance, in Turkey, you may encounter a thicker version called “pide,” while in Lebanon, the bread may be baked in a traditional taboon oven, imparting a unique flavor and texture.
The Ingredients Behind Fluffy Arabic Bread
To create the perfect fluffy Arabic bread, understanding the role of each ingredient is essential. Here is a brief overview of the key components that contribute to its delightful texture and taste:
1. Flour: The foundation of any bread, high-quality flour is crucial for achieving the desired texture. Typically, all-purpose flour is used, but for an even fluffier result, bread flour can be substituted due to its higher protein content.
2. Water: Hydration is key in bread-making. The right amount of water activates the gluten in the flour, giving the bread its structure and elasticity.
3. Yeast: This is the leavening agent that helps the bread rise. Using fresh, high-quality yeast is vital for achieving that airy texture. Active dry yeast or instant yeast can be used, but proper activation is crucial.
4. Salt: While it may seem like a simple ingredient, salt plays a significant role in flavor and controlling the fermentation process. It helps to strengthen the gluten structure, resulting in a better rise.
5. Optional Spices: Adding spices like cumin can enhance the flavor profile of the bread, although this is not a traditional requirement. Experimenting with spices can yield delightful variations.
Using high-quality ingredients is essential to achieving fluffy Arabic bread. Fresh flour and yeast contribute to a superior end product, ensuring that your bread will rise well and have the desired texture.
Step-by-Step Guide to Making Fluffy Arabic Bread
Activating the Yeast: The First Step to Success
The first step in making fluffy Arabic bread is activating the yeast. This process is crucial because it ensures that the yeast is alive and ready to work its magic in the dough. Here’s how to do it:
1. Measure the Yeast: Start by measuring the appropriate amount of yeast according to your recipe. If you are using active dry yeast, you will need approximately 2 teaspoons for every 2 cups of flour.
2. Warm Water: Heat water to a temperature of around 100°F to 110°F (38°C to 43°C). This temperature is warm enough to activate the yeast but not so hot that it kills it.
3. Mixing: In a small bowl, combine the warm water with the yeast and a pinch of sugar. The sugar helps to feed the yeast, stimulating its activation.
4. Wait: Allow the mixture to sit for about 5-10 minutes. You should see bubbles forming on the surface, indicating that the yeast is active and ready to be mixed into your dough.
Tips for Ensuring Optimal Yeast Performance:
– Always check the expiration date on your yeast packaging. Using fresh yeast guarantees better results.
– If you do not see bubbles after 10 minutes, it may be best to start over with new yeast.
Combining Dry Ingredients: Building the Foundation
Once your yeast is activated, it’s time to combine your dry ingredients. This step is essential for building the foundation of your bread:
1. In a Large Bowl: Combine 2 cups of high-quality flour with 1 teaspoon of salt and any optional spices you wish to add, such as cumin.
2. Mix Thoroughly: Use a whisk or a fork to ensure that the salt and spices are evenly distributed throughout the flour. This step is crucial because it ensures that the flavor is consistent in every bite.
3. Create a Well: After mixing, create a small well in the center of the flour mixture. This is where you will add the activated yeast mixture.
Creating and Kneading the Dough: The Heart of the Process
Now that you have your dry ingredients ready, it’s time to create the dough:
1. Add the Yeast Mixture: Pour the activated yeast mixture into the well you created in the flour.
2. Stir to Combine: Using a wooden spoon or your hands, start mixing the flour into the liquid, gradually incorporating more flour until it starts to come together.
3. Kneading: Transfer the dough to a lightly floured surface. Knead the dough for about 8-10 minutes. Kneading is crucial as it develops the gluten, which gives the bread its structure and chewy texture.
– Technique: To knead, fold the dough in half, push it down with the heel of your hand, then rotate it a quarter turn and repeat. You should aim for a smooth and elastic texture.
4. Assessing the Dough: The dough should be slightly tacky but not overly sticky. If it feels too wet, you can gradually add more flour, but be careful not to add too much as this can lead to a dense bread.
The First Rise: Developing Flavor and Texture
After kneading, it’s time to let the dough rise. This step is crucial for developing flavor and achieving the fluffy texture characteristic of Arabic bread:
1. Prepare for Rising: Lightly oil a large bowl and place the dough inside, turning it to coat all sides with oil.
2. Cover: Cover the bowl with a clean kitchen towel or plastic wrap to retain moisture.
3. Warm Environment: Place the bowl in a warm, draft-free area to allow the dough to rise. Ideal temperatures are between 75°F and 80°F (24°C to 27°C).
4. Timing: Allow the dough to rise for about 1 hour or until it has doubled in size. This time can vary based on the temperature of your environment.
How to Recognize When the Dough Has Doubled in Size:
– Gently poke the dough with your finger; if it springs back slowly, it’s ready to be shaped.
Shaping the Bread: Crafting Perfect Rounds
Once your dough has risen, it’s time to shape it into rounds for baking:
1. Punch Down the Dough: Gently punch down the risen dough to release any air bubbles formed during the rising process.
2. Divide the Dough: On a lightly floured surface, divide the dough into equal portions, about the size of a golf ball. This will yield about 6 to 8 pieces, depending on your desired bread size.
3. Shape the Rounds: Take each piece and roll it into a ball between your palms. Then, flatten it slightly with your hands to form a disc.
4. Resting: Allow the shaped discs to rest for about 10-15 minutes under a towel. This rest period helps the gluten relax, making it easier to roll out.
With these steps completed, you are well on your way to creating fluffy Arabic bread that will elevate your meals and impress your guests. The combination of simple ingredients and careful techniques makes this recipe accessible for home cooks of all levels.
Stay tuned for the next part, where we’ll dive into the final steps of baking your fluffy Arabic bread to perfection!
Techniques for Dividing and Shaping the Dough
Once your dough has completed its first rise and has become beautifully puffy, it’s time to divide and shape it into manageable pieces. This process is crucial for achieving the characteristic fluffy texture of Arabic bread.
1. Dividing the Dough: Lightly flour your work surface to prevent sticking. Use a bench scraper or a sharp knife to divide the dough into equal portions. Depending on your desired bread size, you might want to aim for pieces weighing around 100-120 grams. This will yield approximately 8-10 rounds of bread.
2. Shaping the Dough Balls: Once divided, take each piece and gently flatten it into a disc. Use the palms of your hands to stretch the dough outward while tucking the edges into the center. This technique helps create tension in the dough, resulting in a better rise during the second phase. Place the shaped dough balls on a floured surface, ensuring they are spaced apart to prevent sticking.
The Significance of Uniform Thickness in Cooking
Achieving a uniform thickness in your dough rounds is vital for even cooking. When the bread is of consistent thickness, it allows the heat to penetrate evenly, leading to a perfectly puffed and soft texture. Aim for a thickness of about 0.5 cm (approximately 1/4 inch). Use a rolling pin, but be gentle—overworking the dough can lead to denser bread.
The Second Rise: Preparing for Cooking
Understanding the Purpose of the Second Rise
The second rise, also known as proofing, is essential for developing the airy structure of Arabic bread. This rise allows the gluten to relax further and gives the yeast time to produce carbon dioxide, which forms air pockets in the dough. Without this step, the bread may end up flat and dense.
How to Create a Conducive Environment for Rising
To ensure your dough rises effectively, create a warm, draft-free environment. Here are a few methods to do this:
– Warm Oven: Preheat your oven to the lowest setting for a few minutes, then turn it off. Place the dough inside, covered with a damp cloth, to keep it moist.
– Proofer: If you have a proofing box or a yogurt maker, this is an excellent way to maintain a consistent warm temperature.
– Room Temperature: If your kitchen is warm, you can simply cover the dough with a kitchen towel and let it rise on the countertop.
Allow the dough to rise for about 30-45 minutes, or until it has doubled in size.
Cooking the Bread: Achieving the Perfect Puff
Optimal Cooking Techniques Using a Skillet or Griddle
Cooking Arabic bread can be done effectively using a cast-iron skillet or a flat griddle. Here’s how to achieve the best results:
1. Preheat the Skillet: Heat your skillet or griddle over medium-high heat. It’s crucial to make sure the cooking surface is hot enough to create steam, which will help the bread puff up.
2. Cooking the Dough: Carefully transfer one dough round onto the hot skillet. Cook for about 1-2 minutes on one side. You’ll notice bubbles forming on the surface—this is a good sign! Flip the bread over and cook for another 1-2 minutes until it puffs up.
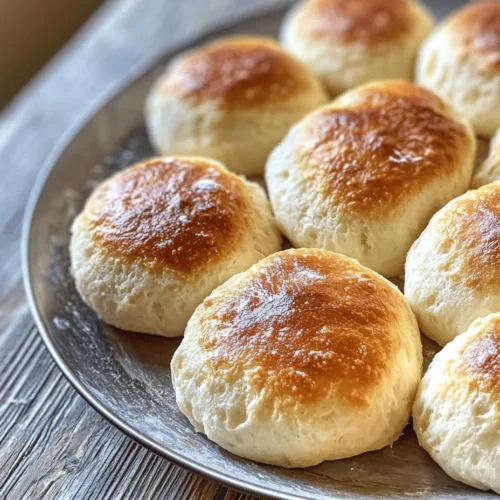
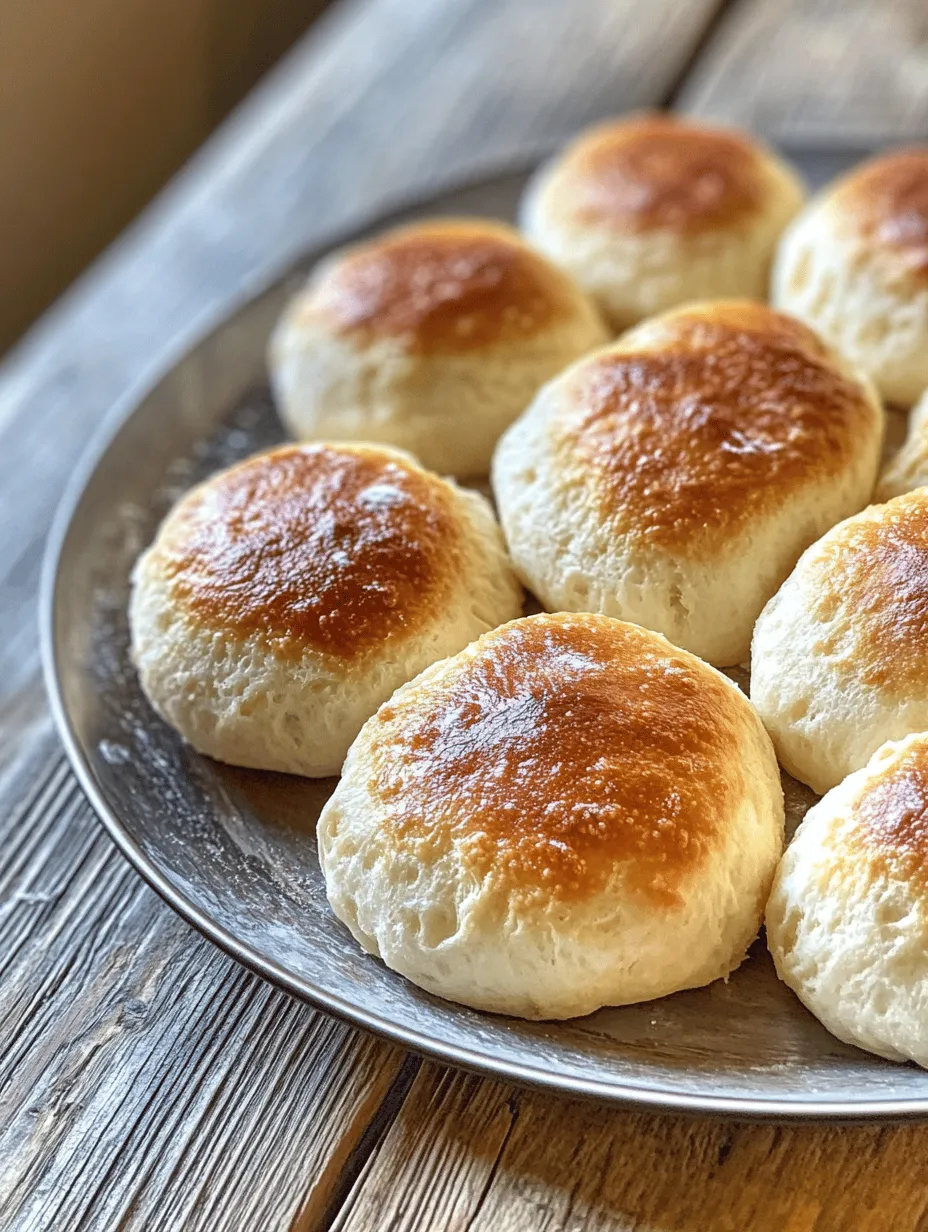
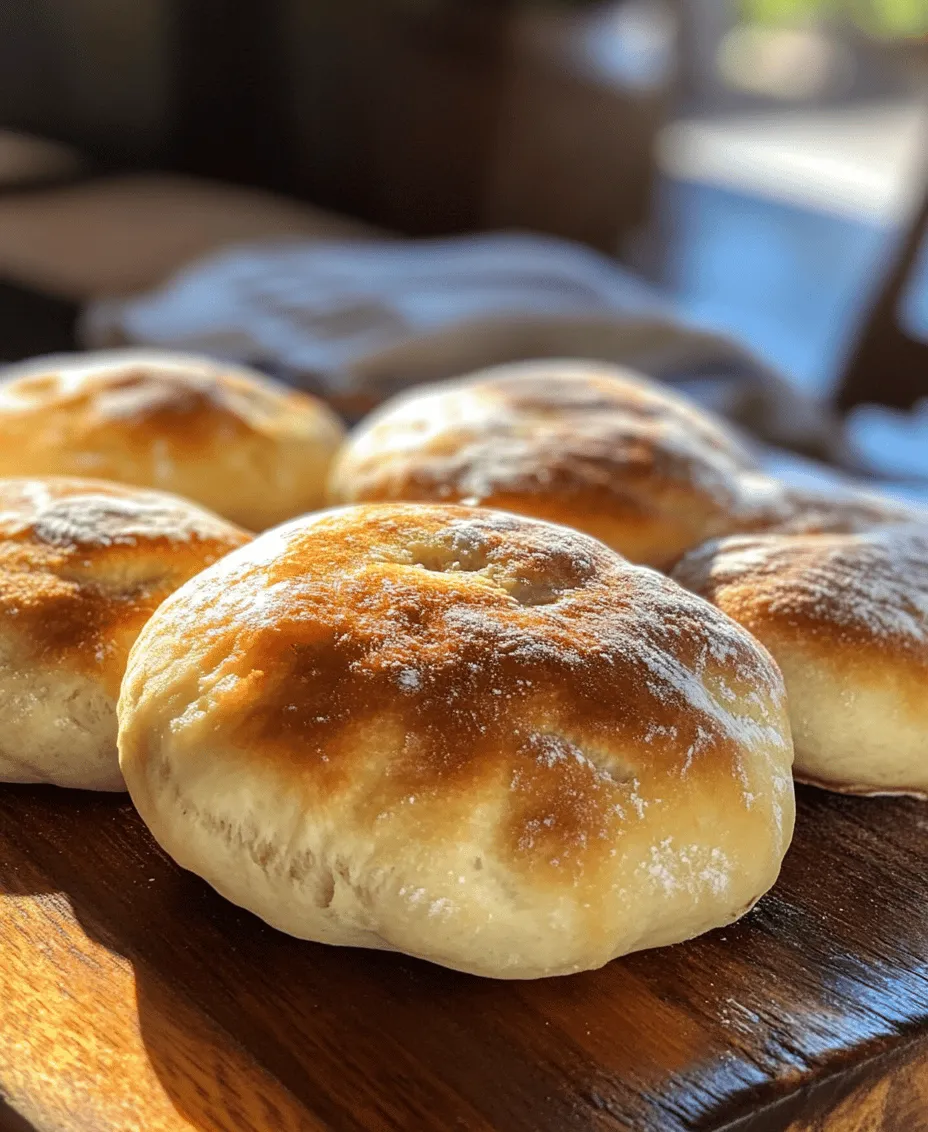
3. Indicators of Doneness: Properly cooked Arabic bread will be golden brown on both sides with a puffed center. If it does not puff, try increasing your heat slightly, as the bread needs steam to rise.
Achieving that Classic Puff
If your bread does not puff up as expected, don’t worry! Here are a few tips to help you troubleshoot:
– Ensure your dough has risen adequately during the second rise.
– Adjust your cooking temperature. If the skillet is not hot enough, the bread will not puff.
– Consider covering the skillet with a lid for the last few seconds of cooking to trap steam, which can aid in puffing.
Serving Suggestions for Fluffy Arabic Bread
Pairing with Dips and Spreads
Fluffy Arabic bread is incredibly versatile, making it the perfect accompaniment to various dips and spreads. Here are some classic and modern pairing ideas:
– Traditional Dips: Hummus and baba ghanoush are quintessential companions for Arabic bread. Their creamy textures and rich flavors complement the bread beautifully.
– Innovative Pairing Ideas: For a twist, try serving the bread with a zesty guacamole or a spicy salsa. The lightness of the bread balances the bold flavors of these dips.
Using Arabic Bread in Meals
Arabic bread can be utilized in numerous ways to enhance your meals:
– Wraps and Sandwiches: Use the bread to create wraps filled with grilled chicken, falafel, or roasted vegetables. Add fresh herbs, lettuce, and a drizzle of tahini for a satisfying meal.
– Side Dishes: Serve your Arabic bread alongside a fresh salad, roasted vegetables, or a comforting soup. The bread can be used to scoop up the last delicious bites on your plate.
Nutritional Information and Health Benefits
Understanding the Nutritional Profile of Arabic Bread
Homemade Arabic bread can be a healthy addition to your diet. Here’s a breakdown of the nutritional profile per serving (assuming a standard serving size of one piece):
– Calories: Approximately 100-120 calories
– Carbohydrates: 20-25 grams
– Protein: 3-4 grams
– Fat: 0.5 grams
– Fiber: 1-2 grams
The use of whole wheat flour can further increase the fiber content, improving digestive health.
Benefits of Homemade Bread Versus Store-Bought Options
Making Arabic bread at home allows you to control the ingredients, avoiding preservatives and additives often found in store-bought versions. Additionally, homemade bread is fresher and can be customized to your taste preferences, whether you prefer a fluffier texture or a heartier flavor.
Health Considerations and Dietary Adaptations
Gluten-Free Alternatives and Substitutions
For those with gluten sensitivities, consider experimenting with gluten-free flours such as almond flour or a gluten-free all-purpose blend. Keep in mind that the texture and taste will vary, so you may need to adjust the liquid content and rising times accordingly.
Adjusting the Recipe for Dietary Restrictions
If you are following a vegan diet, this recipe is naturally vegan-friendly as it contains no eggs or dairy. However, if you want to reduce the calories, opt for less oil or substitute with a healthy fat alternative.
Conclusion
Fluffy Arabic bread is not just a delicious addition to your meals; it is a representation of rich culinary traditions and communal dining experiences. By following this detailed recipe and understanding the techniques behind its preparation, you can enjoy homemade bread that elevates your dining experience. Embrace the simplicity and joy of baking this versatile bread, and savor its delightful taste alongside your favorite dishes. Whether paired with traditional dips or used in modern meals, Arabic bread is sure to be a highlight on your table. Enjoy the process and the flavors of this beloved bread, and share it with family and friends to create lasting memories around the dining table.